"HOME MADE" CINNAMON ROLLS || an easy weekend treat

Years ago, I found the easiest recipe for “home made” cinnamon rolls (Jenny Steffens-Hobick of Everyday Occasions has the most inspiring blog!) and I have been making them at least once a week ever since. I love making batches to give to new mamas, out of town friends or just anyone needing an extra reason to smile. I’ve shared the recipe before years ago, and somehow it got lost when I switched websites a few years ago! So, it’s time to share it again!! It’s so easy, and hardly a recipe, but that’s part of what makes them so good!!

dough
dough1

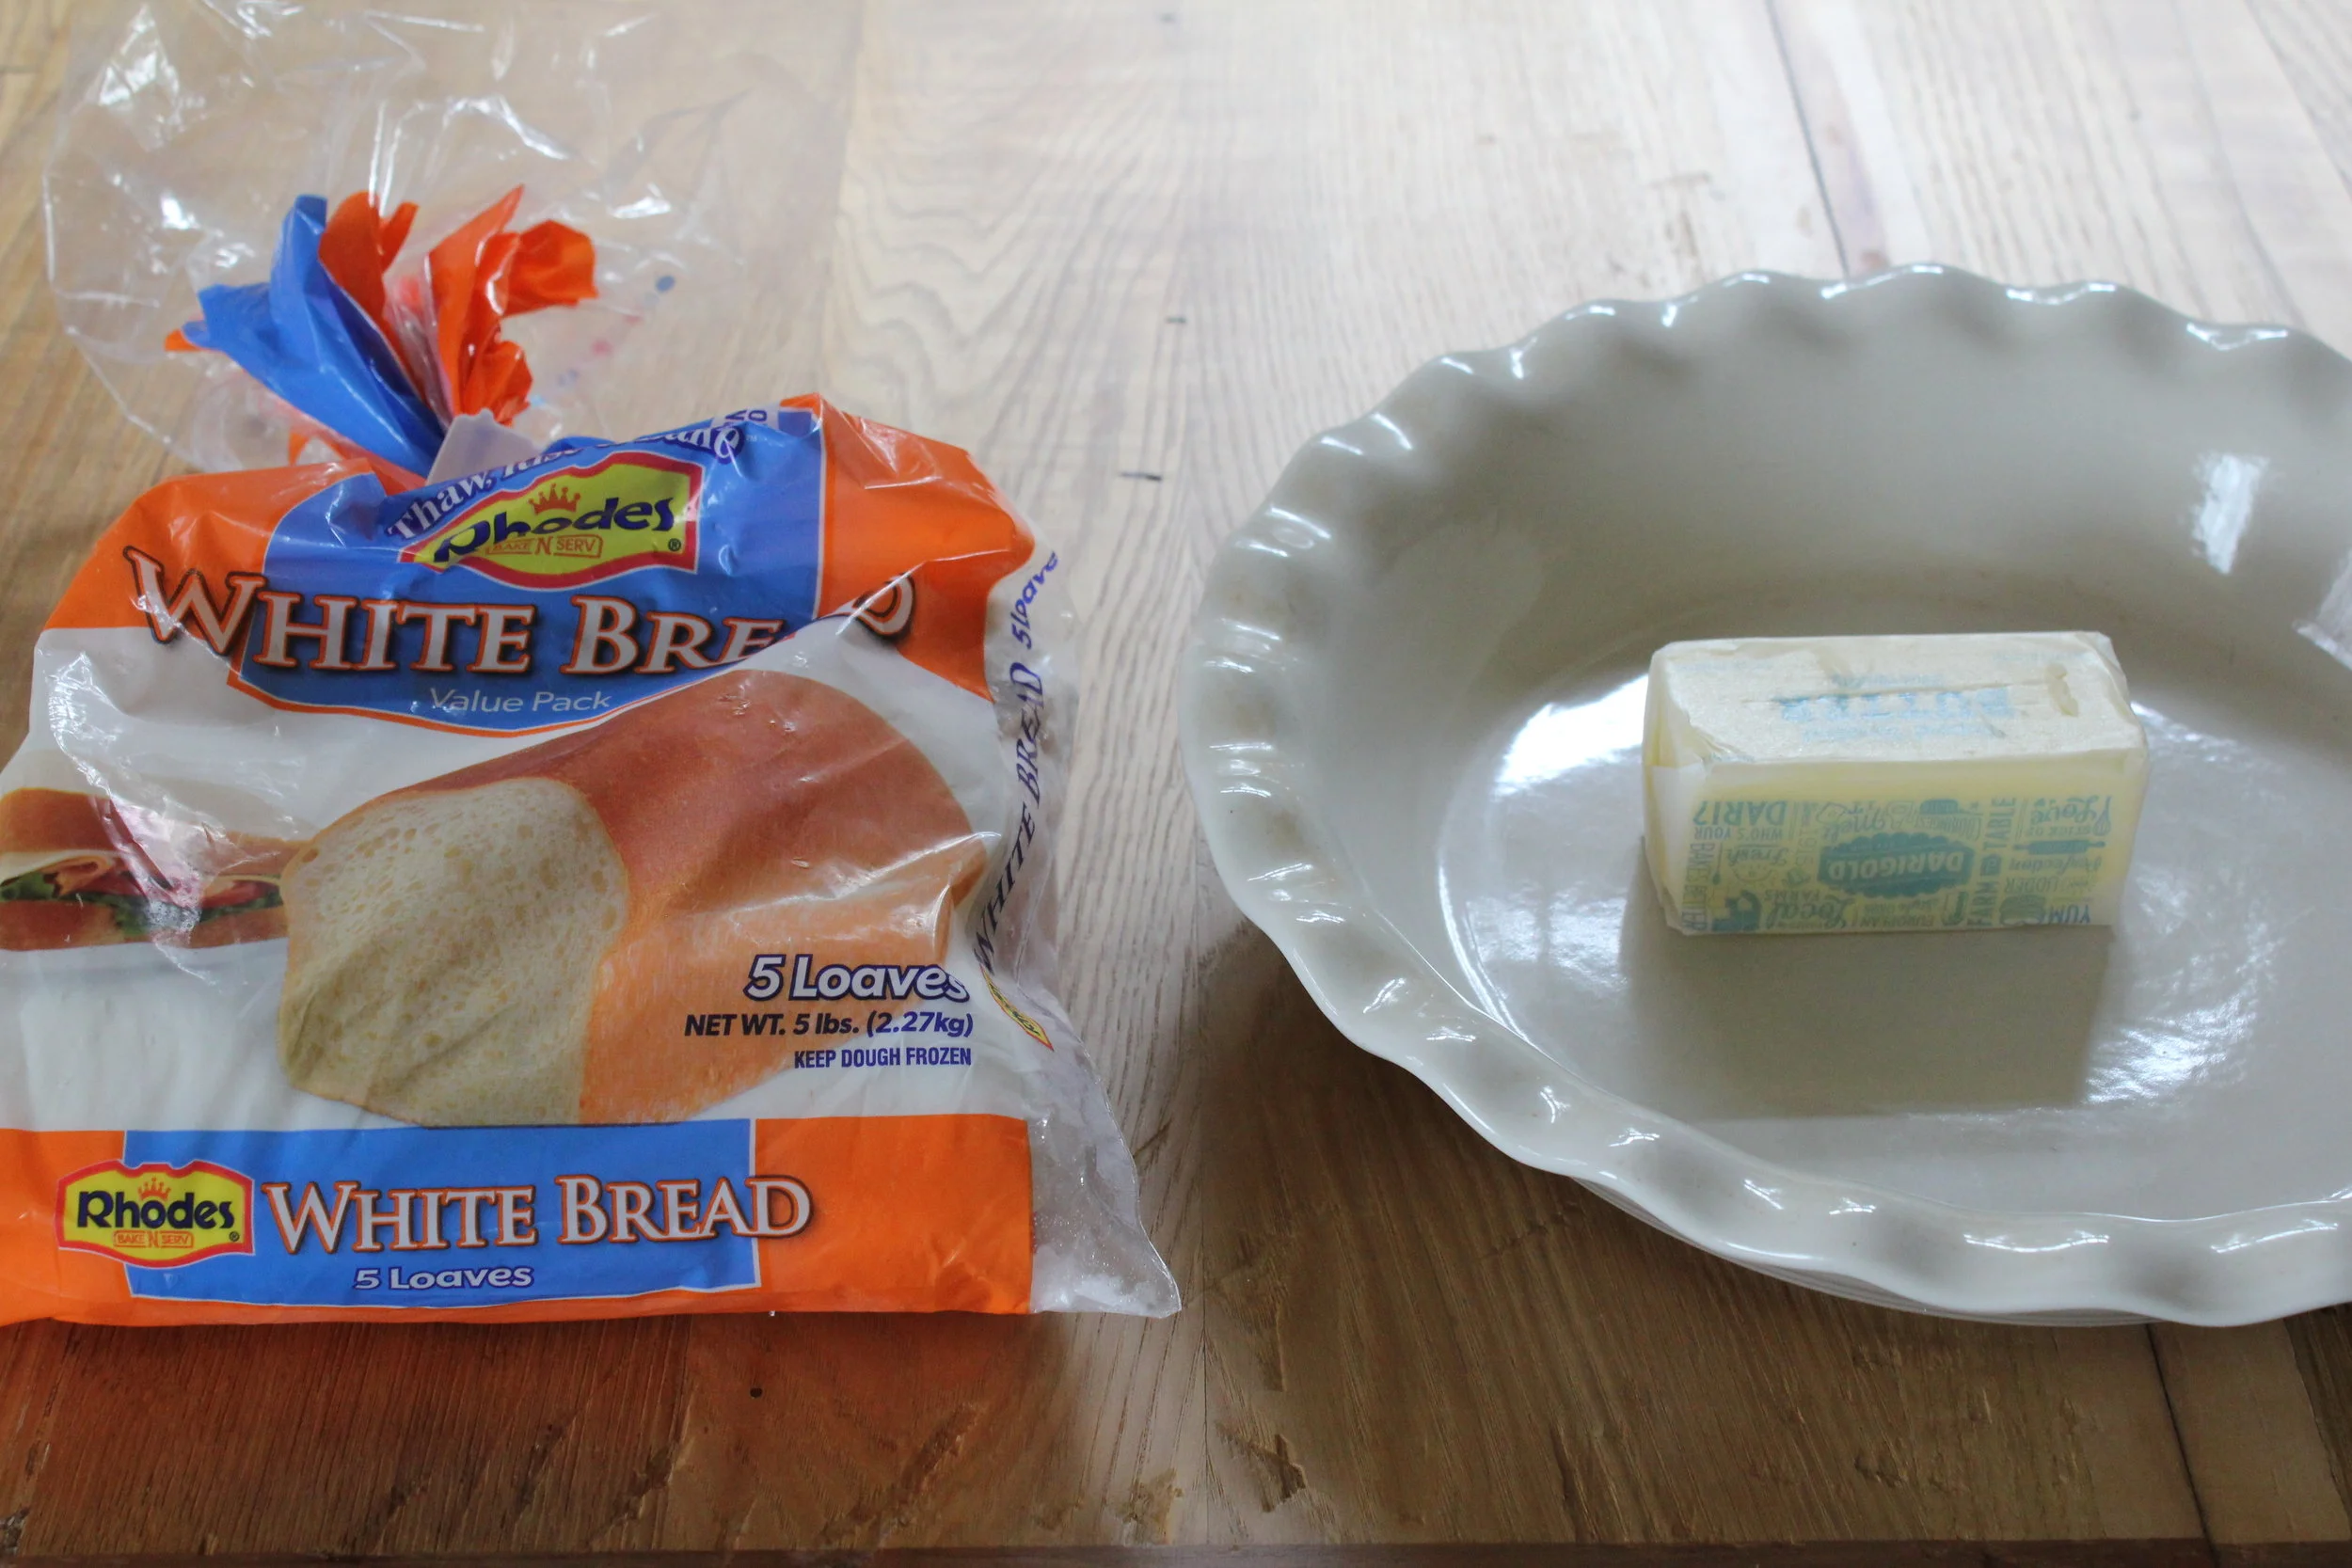
The Rhodes, frozen bread dough is what makes these cinnamon rolls so easy! The bread comes in a 5 pack, I usually use one loaf for our family of four. You are going to defrost your loaf directly in your baking pan, no point in dirtying an extra pan! Cover it with plastic wrap and let it rise in a warm, draft free place until double in size. ( I set out a cube of butter at this time to let it soften.)

IMG_8663.jpg
IMG_8665.jpg

Once the dough has doubled in size (could be 4-8 hours, depending on temperature and humidity) roll it out into a rectangle. Smother on a 1/2 cup (cube) of softened butter and give it a good layer of cinnamon + sugar.

sliced dough
cinnamon rolls

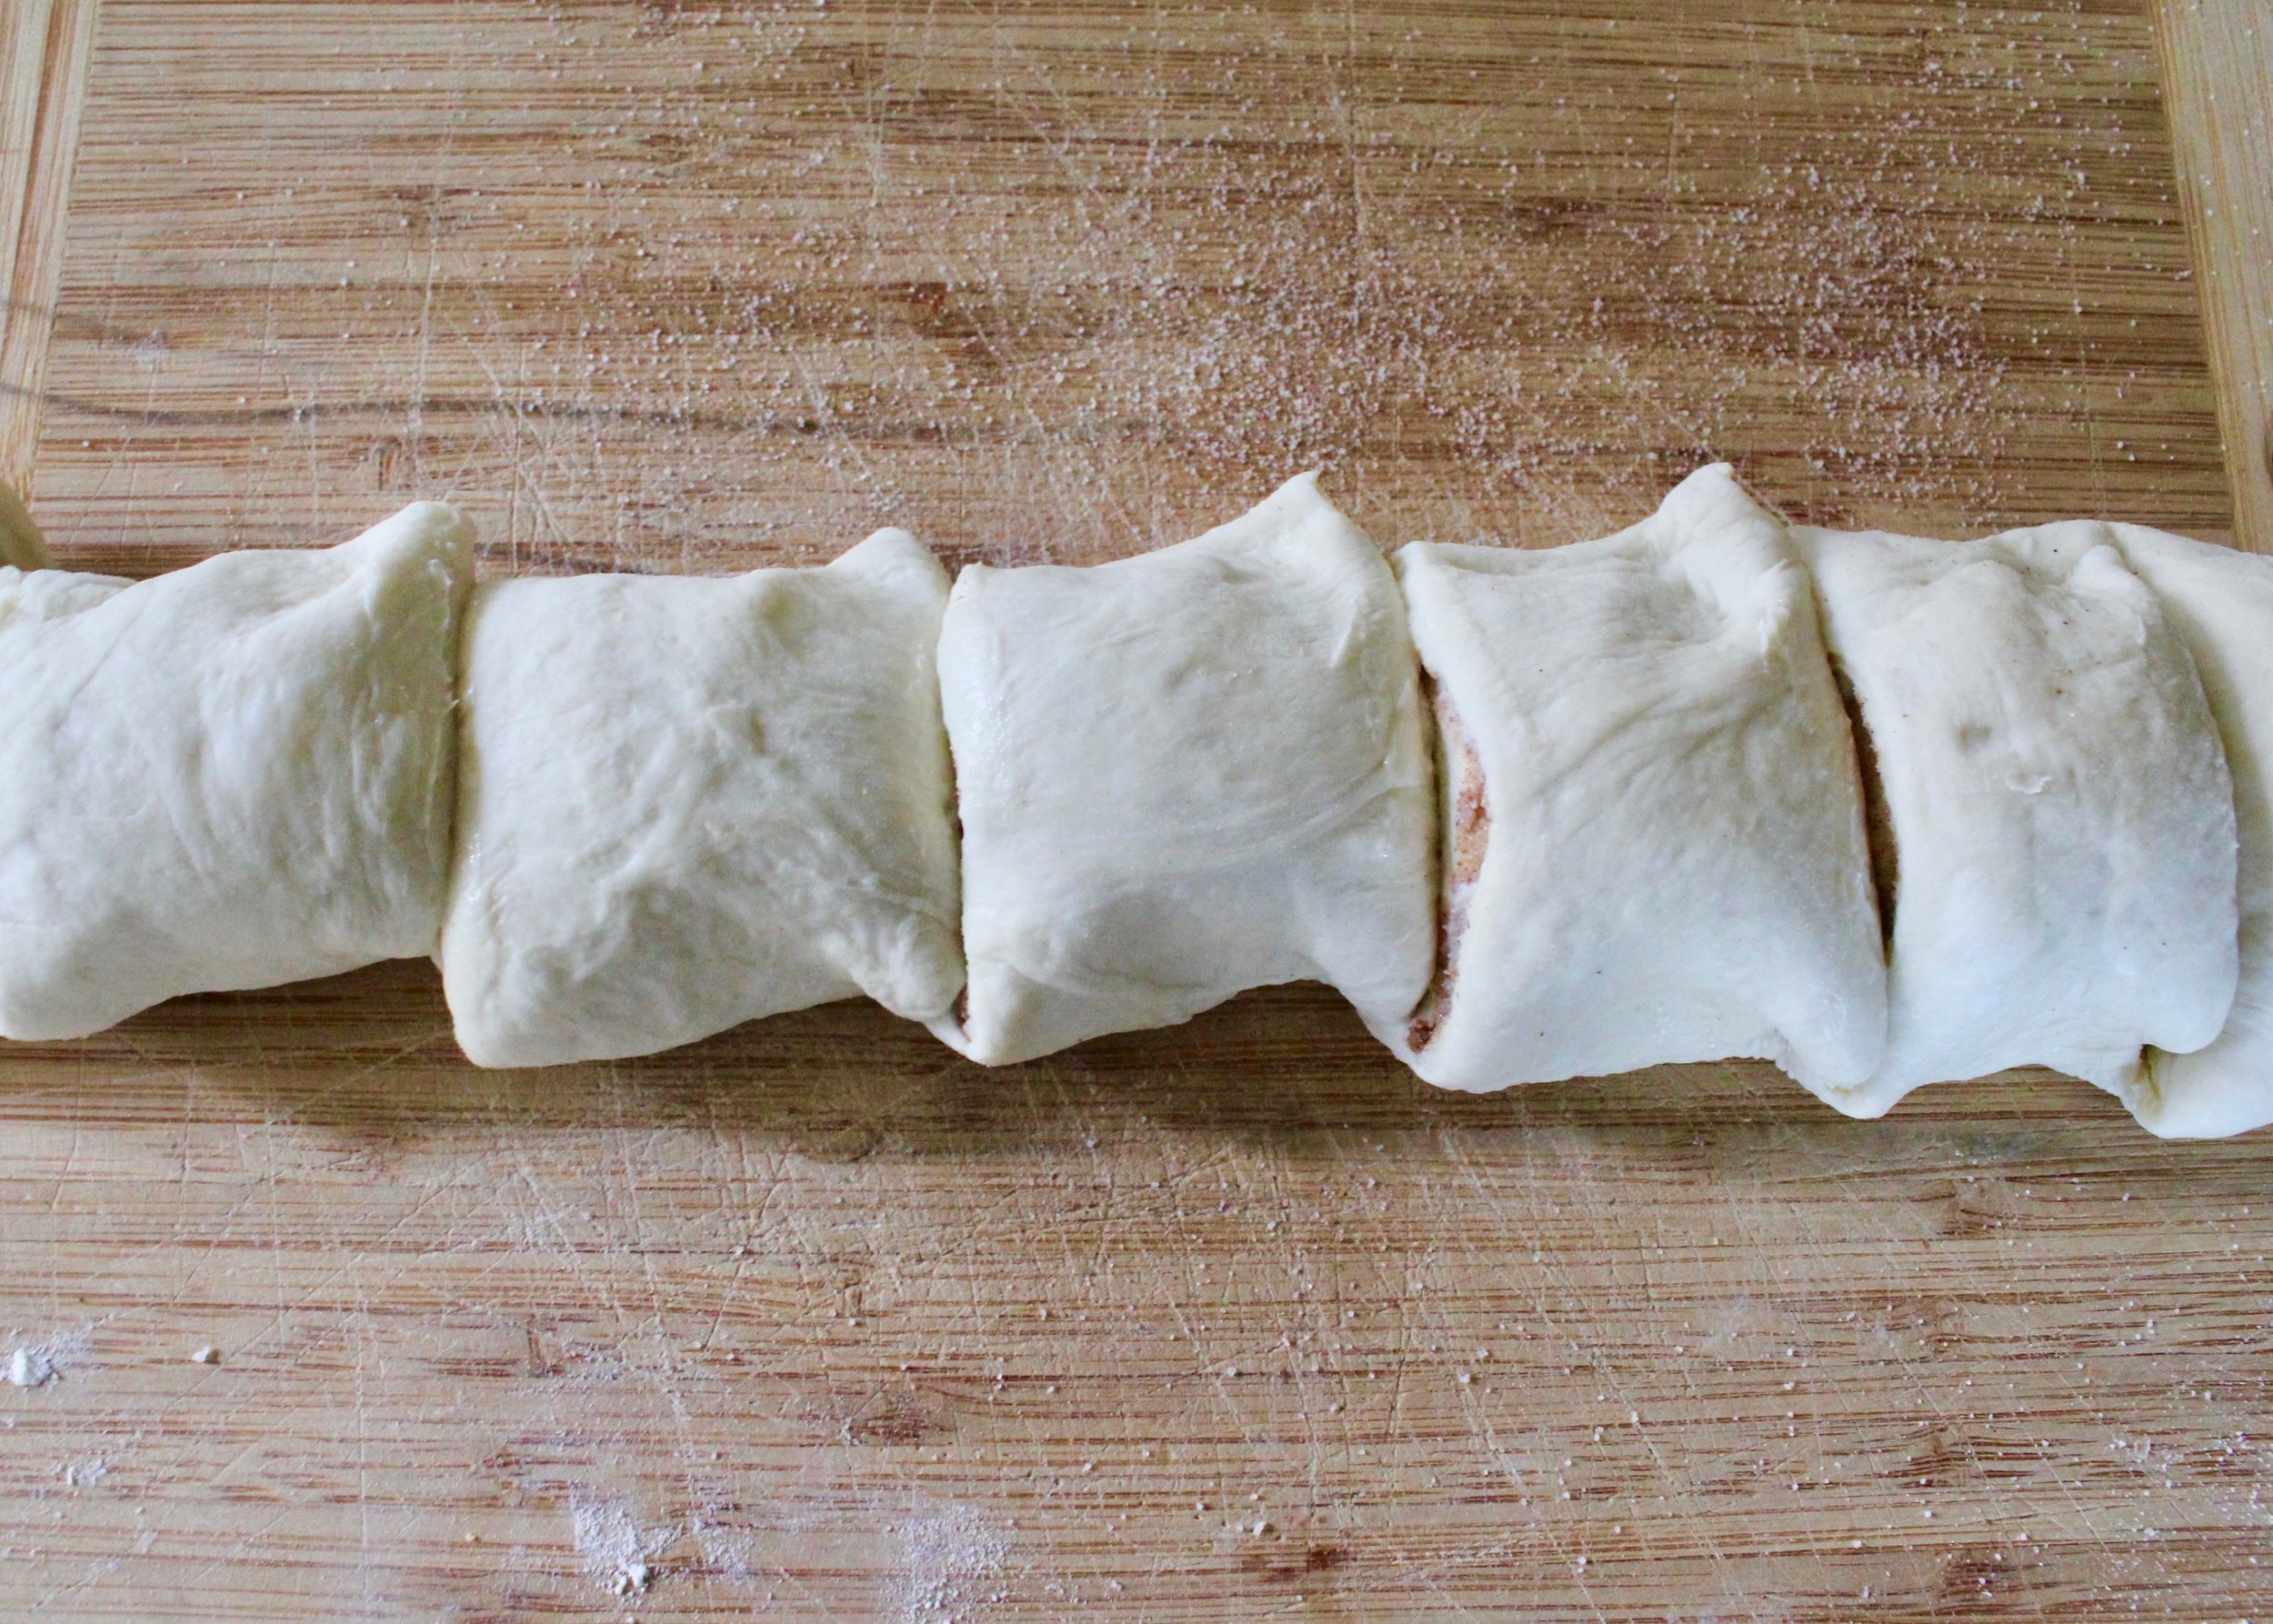
Slice your rolls, about 2 inches long, and place them in your baking pan. Cover with plastic wrap and let rise until doubled in size, about 2-4 hours. Once they are doubled in size, place them in the refrigerator until you are ready to bake them. (I typically do this on Friday, then pop them in the refrigerator Friday evening and they are ready to bake Saturday morning!)

cinnamon rolls

When you are ready to bake your cinnamon rolls, take them out of the refrigerator about an hour before baking, just to let them reach room temperature. Bake at 375 for 18-22 minutes. Right when you removed the rolls from the oven, melt 2 TBS of butter and then mix with powdered sugar, a bit of vanilla extract and milk until you reach your desired consistency for icing. Pour icing over your warm rolls. Enjoy!!!

“ HOMEMADE” CINNAMON ROLLS

1 loaf of Rhodes frozen bread dough

1/2 cup of softened butter + 2 TBSP

cinnamon + sugar mixture

powdered sugar

vanilla extract

milk

Place frozen dough in baking pan. Let bread dough rise until doubled in size (5-8 hours).

Once dough is doubled in size, roll into a rectangle and spread 1/2 cup of butter over dough then generously coat with cinnamon + sugar mixture.

Roll length wise and slice rolls, 2 inches wide. Place in baking pan, cover with plastic wrap and let rise until double in size. Once doubled, place in the refrigerator until ready to bake.

Once you are ready to bake, remove rolls from refrigerator 1 hour before baking. Bake at 375 for 18-22 minutes. As soon as you remove them from the oven pour icing over hot rolls and enjoy!

*Icing

Melt 2 TBSP of butter, add a splash of vanilla extract, powdered sugar and milk until you reach the desired consistency for your icing.

SAVANNA'S ROOM || the sweetest wallpaper

We have finally started to feel settled into our new home. Moving is such a process, isn’t it? I’m pretty sure the last time we moved I said THAT would be the last time I moved ;) Well, here we are again and hopefully we won’t be moving for a very long time!

Now that we are out of boxes, I really want the girls to feel cozy and comfortable here. Their bedroom’s are definitely a priority! Last week my mom and mother-in-law came over and we kicked our rears into gear and wallpapered Savanna’s room in one day!

wallpaer4.jpg
wallpaper2.jpg
wallpaper1.jpg

The existing wallpaper was in such good shape, we decided to wallpaper right over it! The wallpaper I found was not pre-pasted. It was a bit more time consuming, however, once I found the right adhesive, it worked out really well!

I wiped down the walls, made sure the seams were tight and set up a workstation with sawhorses and plywood. It took us a while to get into our grove, but once we did, it actually went pretty fast!

wallpaper3.jpg

I found this sweet owl wallpaper on Wayfair. I looked and looked and this one was definitely a favorite!! I wanted something sweet and whimsical, fairly neutral and not super expensive. This wallpaper hit the mark on all three!!

wallpaper
wallpaper2

Would you believe that her bedroom has the sweetest pedestal sink AND a french door leading to a balcony? The character in this old house is unbelievable!! The bedding and rug is from the shop (except the IKEA checkered duvet cover:) and the bed frame is painted with Annie Sloan Chalk Paint, Graphite.

wallpaper3

I know her room will continue to change and we will find some more treasures to add to it. Until then, she is loving it and so am I :)

Please don’t hesitate to ask any questions about the wallpaper, I am more than happy to help!! Thanks for following along!!

ART ROOM || finding a space to be creative

Hello friend! It’s been a while since I have posted….my apologies! Things have been so busy with moving the shop and our home, but such is life, right? That’s one of the reasons I love January! For me it’s a time to re-set and re-organize after the hustle and bustle of the holidays!

This Christmas, our Christmas present for the girls was turning the sun room (at our new home) into their art room. They are always coloring, crafting and creating at their little art table next to the kitchen and we wanted to create a space for them that allowed them to make messes and be creative!

art room
artrm3.jpg

I have found for myself that when I don’t take the time to be creative, I just start going through the motions. Ya know? I don’t enjoy life to the fullest! I am determined to be aware of then I need a little creative re-set!

sinartroom.jpg

I hope you can carve out some time to be creative this year too! Whether it’s in the kitchen, the garden, or whatever, a little time to re-charge our creative side is always a good thing :)

OUR HOME || a few changes

I’m having so much fun looking through these old photos! Sometimes it’s easy to forget how much progress you have made on a project….it’s such a good reminder to look back and see how far you have come!

palyrmbefore.jpg
basementbefore.jpg
basementbefore1.jpg

We have a huge basement which we really love and spend quite a bit of time using! The girl’s playroom is tucked around a corner so it can be a complete disaster and you have no idea! It took us a while to figure out how we would best utilize the space, but once we figured it out, we’ve never looked back!

3270 Northwest Westside Rd_Print Res_76.jpg
3270 Northwest Westside Rd_Print Res_77.jpg

There was some great storage space in the playroom! Matt converted one of the storage closets into a little book nook for the girls, it’s one of their favorite spots!! We also had a ductless heat/ac unit installed and new carpet. Both make the room feel super cozy!

3270 Northwest Westside Rd_Print Res_71.jpg
3270 Northwest Westside Rd_Print Res_70.jpg

We made some changes in the basement, mostly changes just making the space work better for us. We moved an exterior door which allowed us to make a cozy living room space next to the fireplace. This is were we get cozy watching movies and snuggling in for Saturday morning cartoons. Matt modified the built-in cabinetry and I painted the cabinetry with Miss Mustard Seed Milk Paint, “Typewriter”. I sealed the paint with 3 coats of Hemp Oil and it’s one of my favorite cabinets in the house!

We also have a wet bar/game area, laundry room and bathroom downstairs, but those just don’t look as pretty in pictures :)

prbefore.jpg

One of my favorite rooms that we have re-done in this house is the powder room. It’s just got so much personality, yet it’s simple and classic!

3270 Northwest Westside Rd_Print Res_39.jpg

We touched every part of this little room, Matt even built a new window! If you want any sources, please just let me know, I am happy to share!!

Another one of my favorite rooms is the dining room! When we bought the home, it had French doors on one wall and a swinging door on the other wall. It was completely separated from the kitchen and the living room, so we made a couple of changes…..

drbefore1.jpg
3270 Northwest Westside Rd_Print Res_13.jpg
3270 Northwest Westside Rd_Print Res_16.jpg

Matt installed a beautiful paneling to the walls! It was so labor intensive but his OCD totally paid off and the walls are perfection!! I love the simplicity of the dining room! It allows me to have a lot of fun with seasonal centerpieces too!!

There are so many wonderful things I love about this house! Truly, we will be sad to leave. We thought it would be our forever home, but now it will be the perfect home for a new family!!

OUR HOME || a few changes and a few before + after photos

Well friends, life went and got busy……you too? It sure happens fast, doesn’t it? The girls and I thoroughly enjoyed summer break and we even snuck out of town for a few weekend get-aways.

girls.jpg

We also sold our little vacation rental in Carlton (we talk about doing that every year, but have never had another project to put that money towards). It was bittersweet, you know? That home holds so many memories. However, that allowed us to move towards purchasing a farm in Carlton!! On September 28th we closed escrow on the farm, put our shop building up for sale, and last week we listed our home! Things have been a little crazy around here lately, and God is gently teaching me so many lessons along the way :)

wl.jpg

It’s no secret that Matt and I love old homes. We love to remodel them for clients, we love to design new homes to look like old homes, and we love to live in old homes! The home we purchased in Carlton was built in 1911 and the character and craftsmanship is unreal. I can’t wait to share more of it with you!

In the mean time, I wanted to share some BEFORE + AFTER photos of our current home, hoping that it inspires you enjoy your home to the fullest, regardless of budget or DIY skills :)

IMG_4820.JPG
IMG_4815.JPG

The biggest changes we made in the kitchen were opening up the kitchen/living room wall and raising the sunken living room floor. Before the area was really cramped and hard to have multiple people in the kitchen, let alone really utilize the island! PS-all of the “AFTER” photos are from our realtor’s fantastic photographer, Mark Coffman.

3270 Northwest Westside Rd_Print Res_20.jpg
3270 Northwest Westside Rd_Print Res_29.jpg

We kept some of the original cabinetry (it was in really good shape, just needed a paint job), modified some and built some. We moved the oven and kitchen sink which has been so helpful with the flow! We hosted our small group Monday night for dinner and it was so great to have plenty of room for 12 adults and 12 kids!

3270 Northwest Westside Rd_Print Res_30.jpg
3270 Northwest Westside Rd_Print Res_26.jpg

We went with black leathered granite for the countertops and I used Annie Sloan Chalk Paint for the cabinetry. I painted the island “Graphite” (Chalk Paint) and the perimeter “French Linen” (Chalk Paint) and sealed them both with Annie Sloan Lacquer and Clear Wax.

Matt used some reclaimed Oak for the open shelves, and welded the brackets and painted them black. I have done a lot of research on induction ovens, and we have installed a handful of them in remodels, so I was really anxious to get one for the kitchen. After a lot of research, I decided to go with the Bertazzoni induction range. I love the sleek design, how it sits almost flush with the cabinetry, and I love the way it works! It pre-heats incredibly fast, cooks evenly and I love the induction cooktop even more than I thought I would.

3270 Northwest Westside Rd_Print Res_18.jpg

We also added stone to the mudroom/kitchen entry floor and I am so happy we did!!! It rains here so often and with muddy boots and wet paws, this has been so good!! OK, I won’t overload you with pictures now, and I will add some more pictures next week. Thanks for always following along on our journey, it means so much to us!!

MY FAVORITE PAINT TIP || custom colors

There are so many tried and true paint colors floating around the internet.....SW Repose Gray, SW Amazing Gray, SW Alabaster, and the list goes on.  But, what do you do when those colors just aren't right for your space?!?  Have the color custom made!

house

Last year we painted the exterior of our home.  I was having the hardest time finding the perfect white.  Our white vinyl windows were a little bleached from the sun and I wanted a seamless look between the siding, trim and windows.

front door

After a few samples of white paint, we decided to just take the white screen to our local Rodda Paint.  They mixed a white that perfectly matched the screen.  Not too cool, not too warm.....just right! 

garage

We did the same thing with our garage!  We wanted it to match our barn.  We took a piece of the stained cedar siding from the barn and Rodda Paint matched it, they came up with a perfect paint color!  I have actually done this for years....I have taken in Pottery Barn catalogs, fabric, flower petals and of course pictures! 

house exterior

I definitely recommend a local paint store versus a big box store's paint department.  The local paint stores typically have knowledgable staff and they are willing to mix colors and work with you.  Plus, I just love knowing the staff and building that relationship with them!  

IMG_8488.jpg

In other news, and completely un-related to paint colors :), we added two dwarf nigerian goats to our family!  They are just the sweetest!!!

goats

Meet Bean and Ruby!  They are brother and sister, and just about the sweetest little four legged creatures I have met.  We've had them for a few weeks now and I can easily find myself becoming the crazy goat lady.  I'm already planning how we can add more babies to our little goat family next Spring :}

IMG_8489.jpg

The goats and chickens live together and it is the cutest thing to watch them play together!

Rooster

Thanks so very much for popping by the blog!

Wishing you a wonderful weekend!

SCHOOL HOUSE LIGHT FIXTURES || favorite sources

IMG_8438.JPG

I know I'm not the only one in love with school house light fixtures!  We have installed them in various projects over the years and they still look so good.  To me they are classic and timeless.  I thought I would share a couple of my favorite sources for school house light fixtures, in case you love them as much as I do :)


schoolhouse-sconce-opaque-red-double-stripe.jpg

My go-to for gooseneck and barn light fixtures is Barn Light Electric.  You can customize your fixture with color, globe, arm size and more.  The fixtures are very well made, and made in the USA!  

107291_4_large.jpg

Another favorite is Schoolhouse Electric.  Schoolhouse Electric is located in Portland and I can spend hours in their warehouse!  So much hard work and creativity goes into each fixture they create.  It's truly a fixture you would never want to, or need to replace. 

1.jpeg

I have also purchased school house pendants from Elk Lighting.  We have these pendants in the shop and I love them!  Classic, fun and big enough to make a statement.  

Have you purchased a school house fixture from another company?  I would love to hear about it!  

POWDER ROOM || before + after

Hello friends!

Well, we finally finished our powder room!  It only took us one year ;)  Now, in Matt's defense, he demoed the space last year and then we moved on to exterior house projects while the weather was nice.  Here are a couple of BEFORE pictures of our hard working powder room....


powderroombefore
bathroombefore1.jpg

And how the finished space looks now.....

schoolhouselight
IMG_8445.jpg

The original walls are plaster and had two layers of wallpaper on them.  One day last year I felt ambitious and starting removing the wallpaper.  Well, once I realized that it was going to take me A LOT of time to get those walls stripped down and looking good, Matt decided to swoop in and save the day by suggesting paneling!  We wanted to do something different and he came up with the idea of a vertical paneling.  I love the clean lines and simplicity!  

IMG_8431.jpg
IMG_8432.jpg

A couple of years ago, Matt was finishing up a big cabinet job and the homeowner had used this beautiful travertine throughout her new home.  She had two big crates left over and Matt asked if she was going to sell them....sure enough!  We have enough of this stone to use in our entry and kitchen.  It's just been waiting so patiently in the garage for the last couple of years,  it feels so good to finally start seeing it in our home!

IMG_8454.jpg
IMG_8449.jpg

Matt built this vanity from some left over reclaimed Fir that he had used on a different project.  To protect the wood from water damage, I oiled it with 4 coats of Miss Mustard Seed Hemp Oil.  He cut a hole in the top and we have a white, rectangular, undermount sink dropped in there.  I love wall mount faucets and will use them any chance I can!  This wall mount faucet is polished nickel and I love the look of it against the old wood!

IMG_8422.jpg
IMG_8425.jpg

The schoolhouse light is one of my other favorite things in this space!  Black and white is so classic!  The light is from Barn Light Electric and it's such a beauty!!  I'm not much of a niche person but Matt thought it would be nice and I am so glad he built that little space in.  It's perfect for fresh flowers and a candle.  The mirror is from the shop and it's fun and kind of funky.  You can see our new black door in the mirror....we are slowly switching out all of our hollow-core, flat panel doors with solid core, black paneled doors and I LOVE them!

It was such a fun little space to remodel!  It sure makes me excited to tackle the other two bathrooms :)  Thanks for following along!  It you have any questions about specific products used, just ask in the comments or shoot me an email!

xoxo

Darci

MOTHER'S DAY || lovin' on the ladies in our lives

It's hard to believe that Mother's Day is next month!  How is that possible?  Didn't we just finish up our holiday celebrations?!?  Well, whether or not I want to believe it, May is fast approaching.  We have some fun things lined up at the shop!

flower.jpg

I have some very creative and incredibly talented ladies joining me at the shop on Saturday, May 12th!  My sweet flower farming friend Beth, of Crowley House Flower Farms, is going to be teaching a flower crown workshop!  If the weather is cooperating, we will have this fun workshop set up in the side yard at the shop.  If the weather is less than ideal, it will be in the garage...either way, it's going to be so fun!!!  Skill level does not matter my friends!  Beth will help each person create their own darling masterpiece, regardless of age or skill level :)  We will have yummy treats and drinks too!  

We have two time slots:

11am - 1pm & 2pm -4pm

$30 per person

29402830_1809021732725295_2280265778886344704_n.jpg

Another incredibly creative and talented friend joining us at the shop on May 12th is Tanya of Rough Cut Soap Co.  Tanya makes the most beautiful soaps I have ever seen!  I don't mean to sound dramatic, but she really does!  I can't wait to see what lovely pretties she will be bringing!!


25013778_157472515017994_3383074687415222272_n.jpg

My super sweet and talented friend Shelby of Huckleberry Home, will be joining us a bringing her darling, handmade signs.  Shelby sold her signs at the Maker's Market we hosted in November and her sweet signs flew out the door!  I am so excited to have her back!

final-48.jpg

And then there are these two little cuties who want to sell their cookies on Saturday!  It's so sweet to listen to them plan their booth and their little cookie menu!  They really love being at the shop and I want to savor, and nurture that, for as long as I can!  Even if it means I stay up until 1am packaging cookies ;)

So, I hope you will plan on spending some time with us May 12th!  Bring your mama, your sister or your girlfriend!  It will be such a fun day and an excuse to love on, and connect with those special ladies in your life!!

Happy weekend!!

xoxo

Darci

PARK DRIVE || renovation in McMinnville

Hello friends!  I thought I would share just a few more pictures from the Park Drive remodel.  Matt and I have a shared affection for old homes.  There are a lot of creative ways to bring old home character to a home of any age, but there is just something extra special about a home thats been standing for almost 100 years!

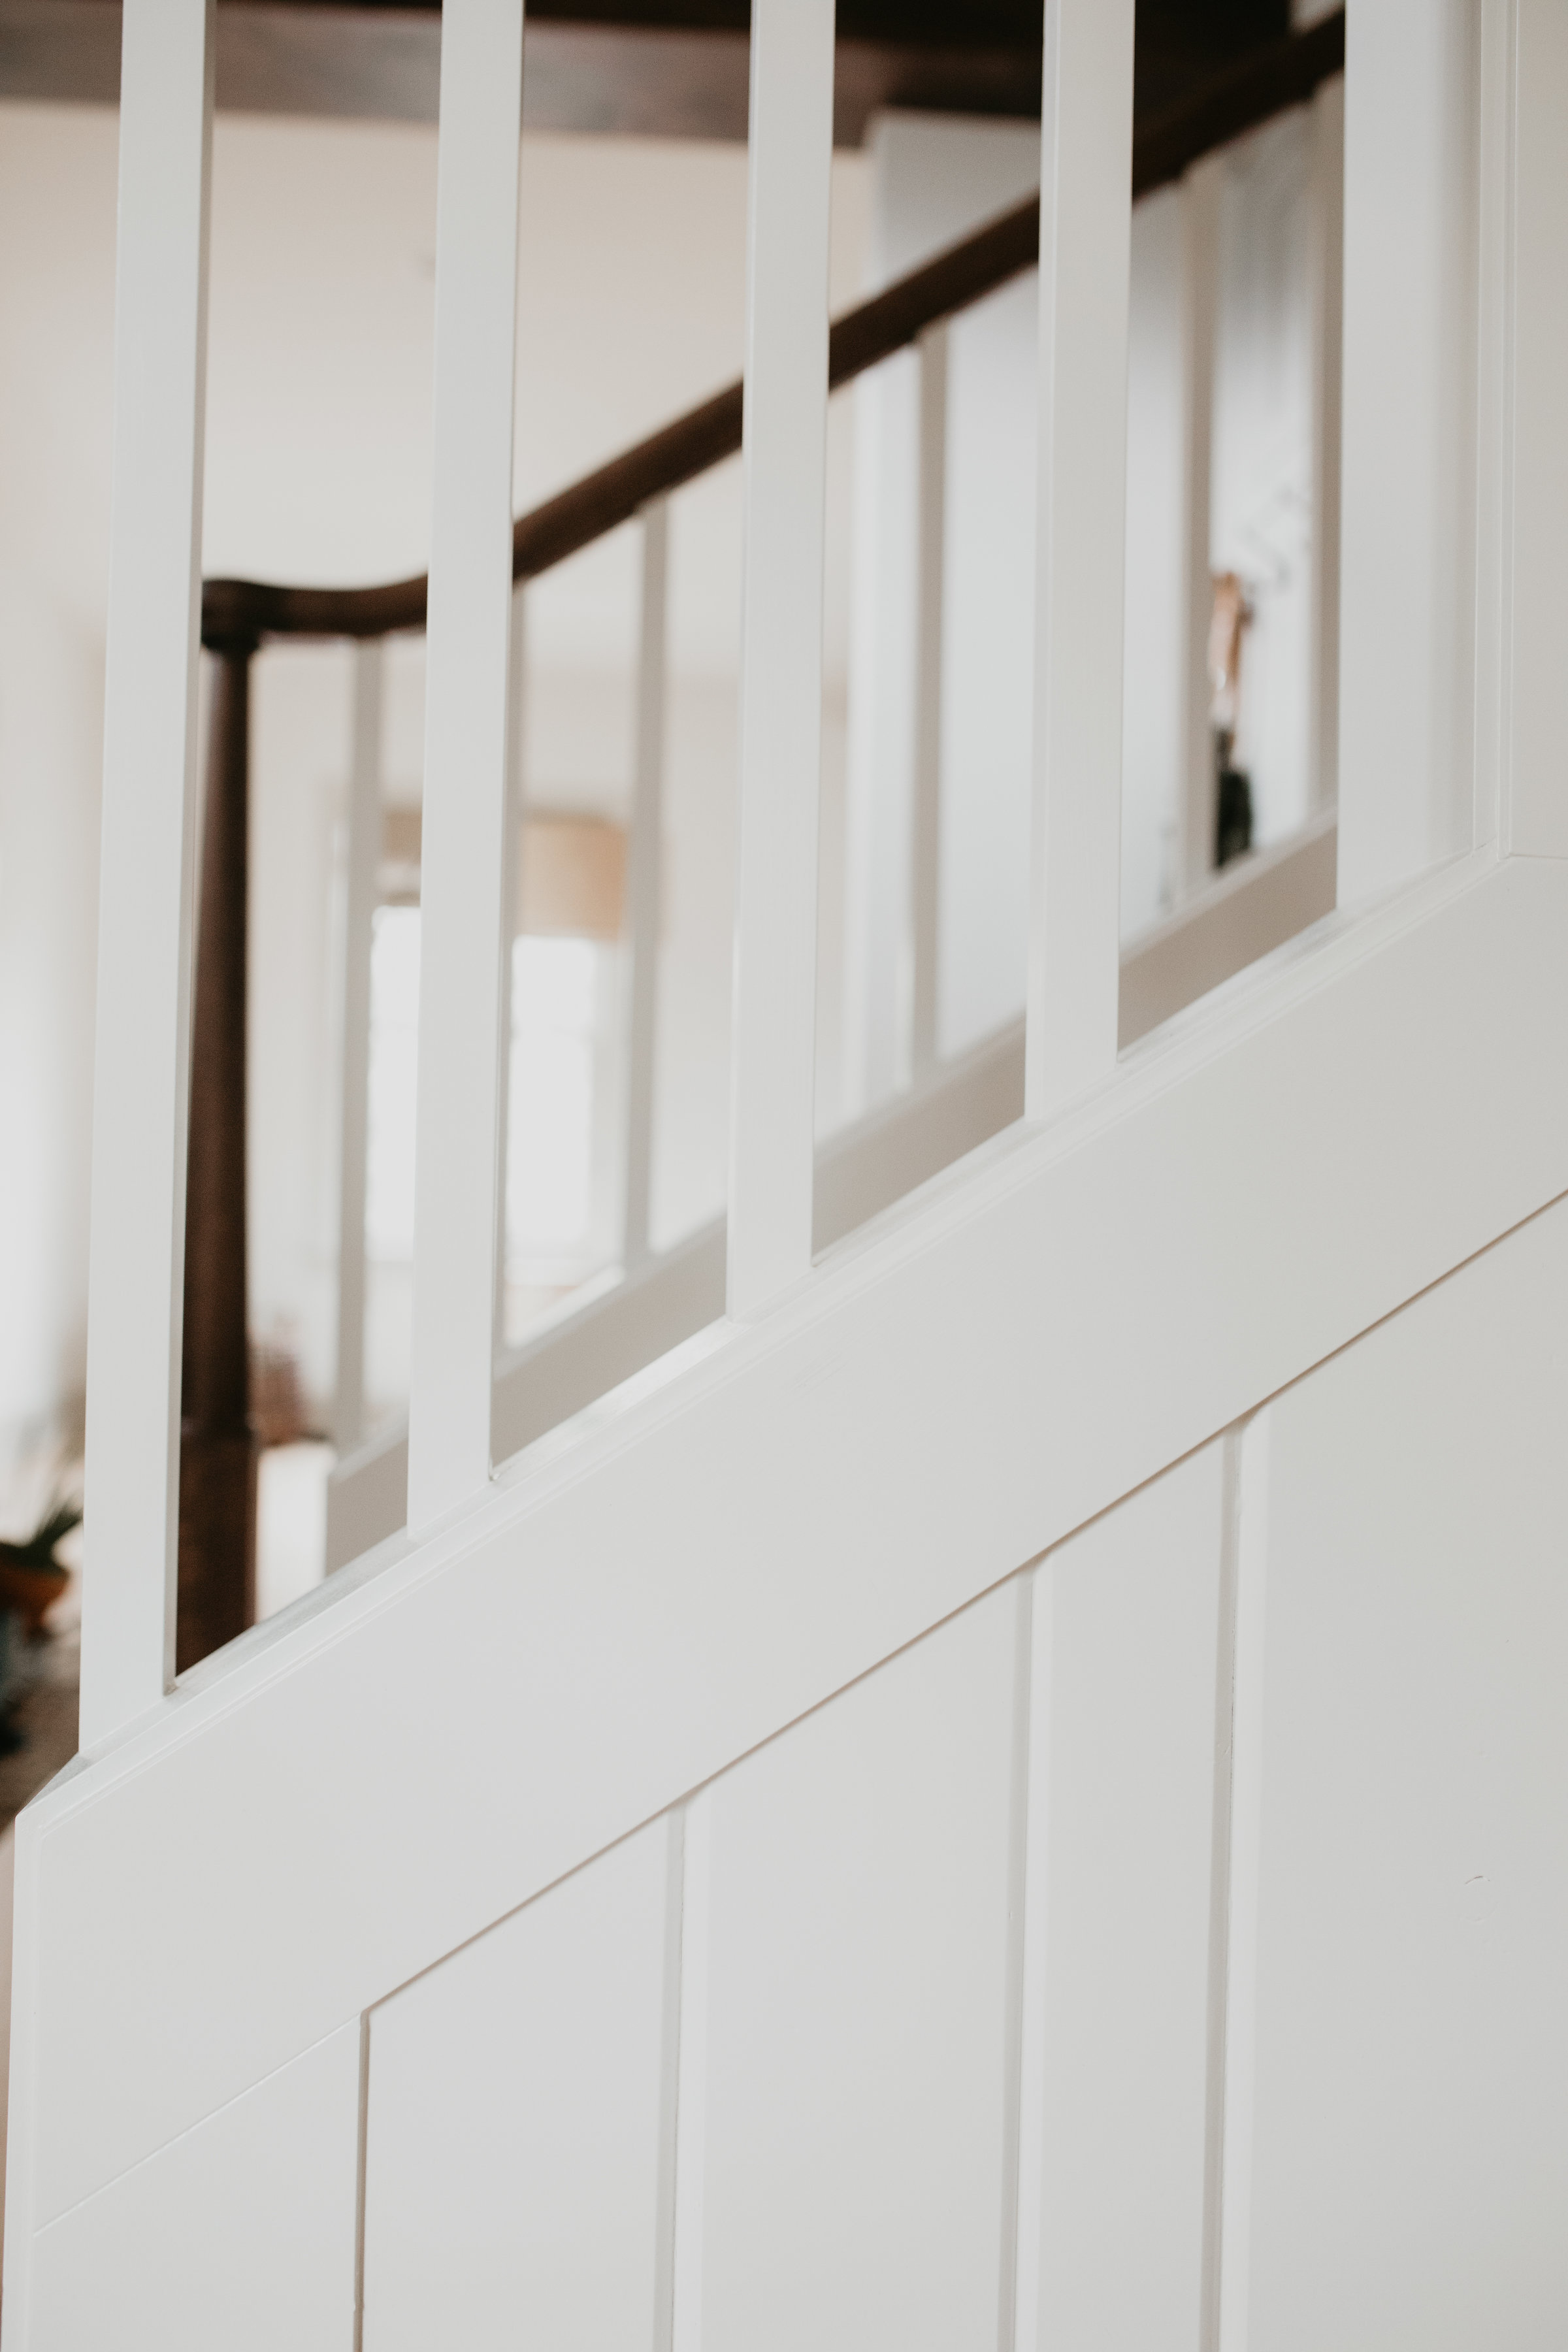
staircase
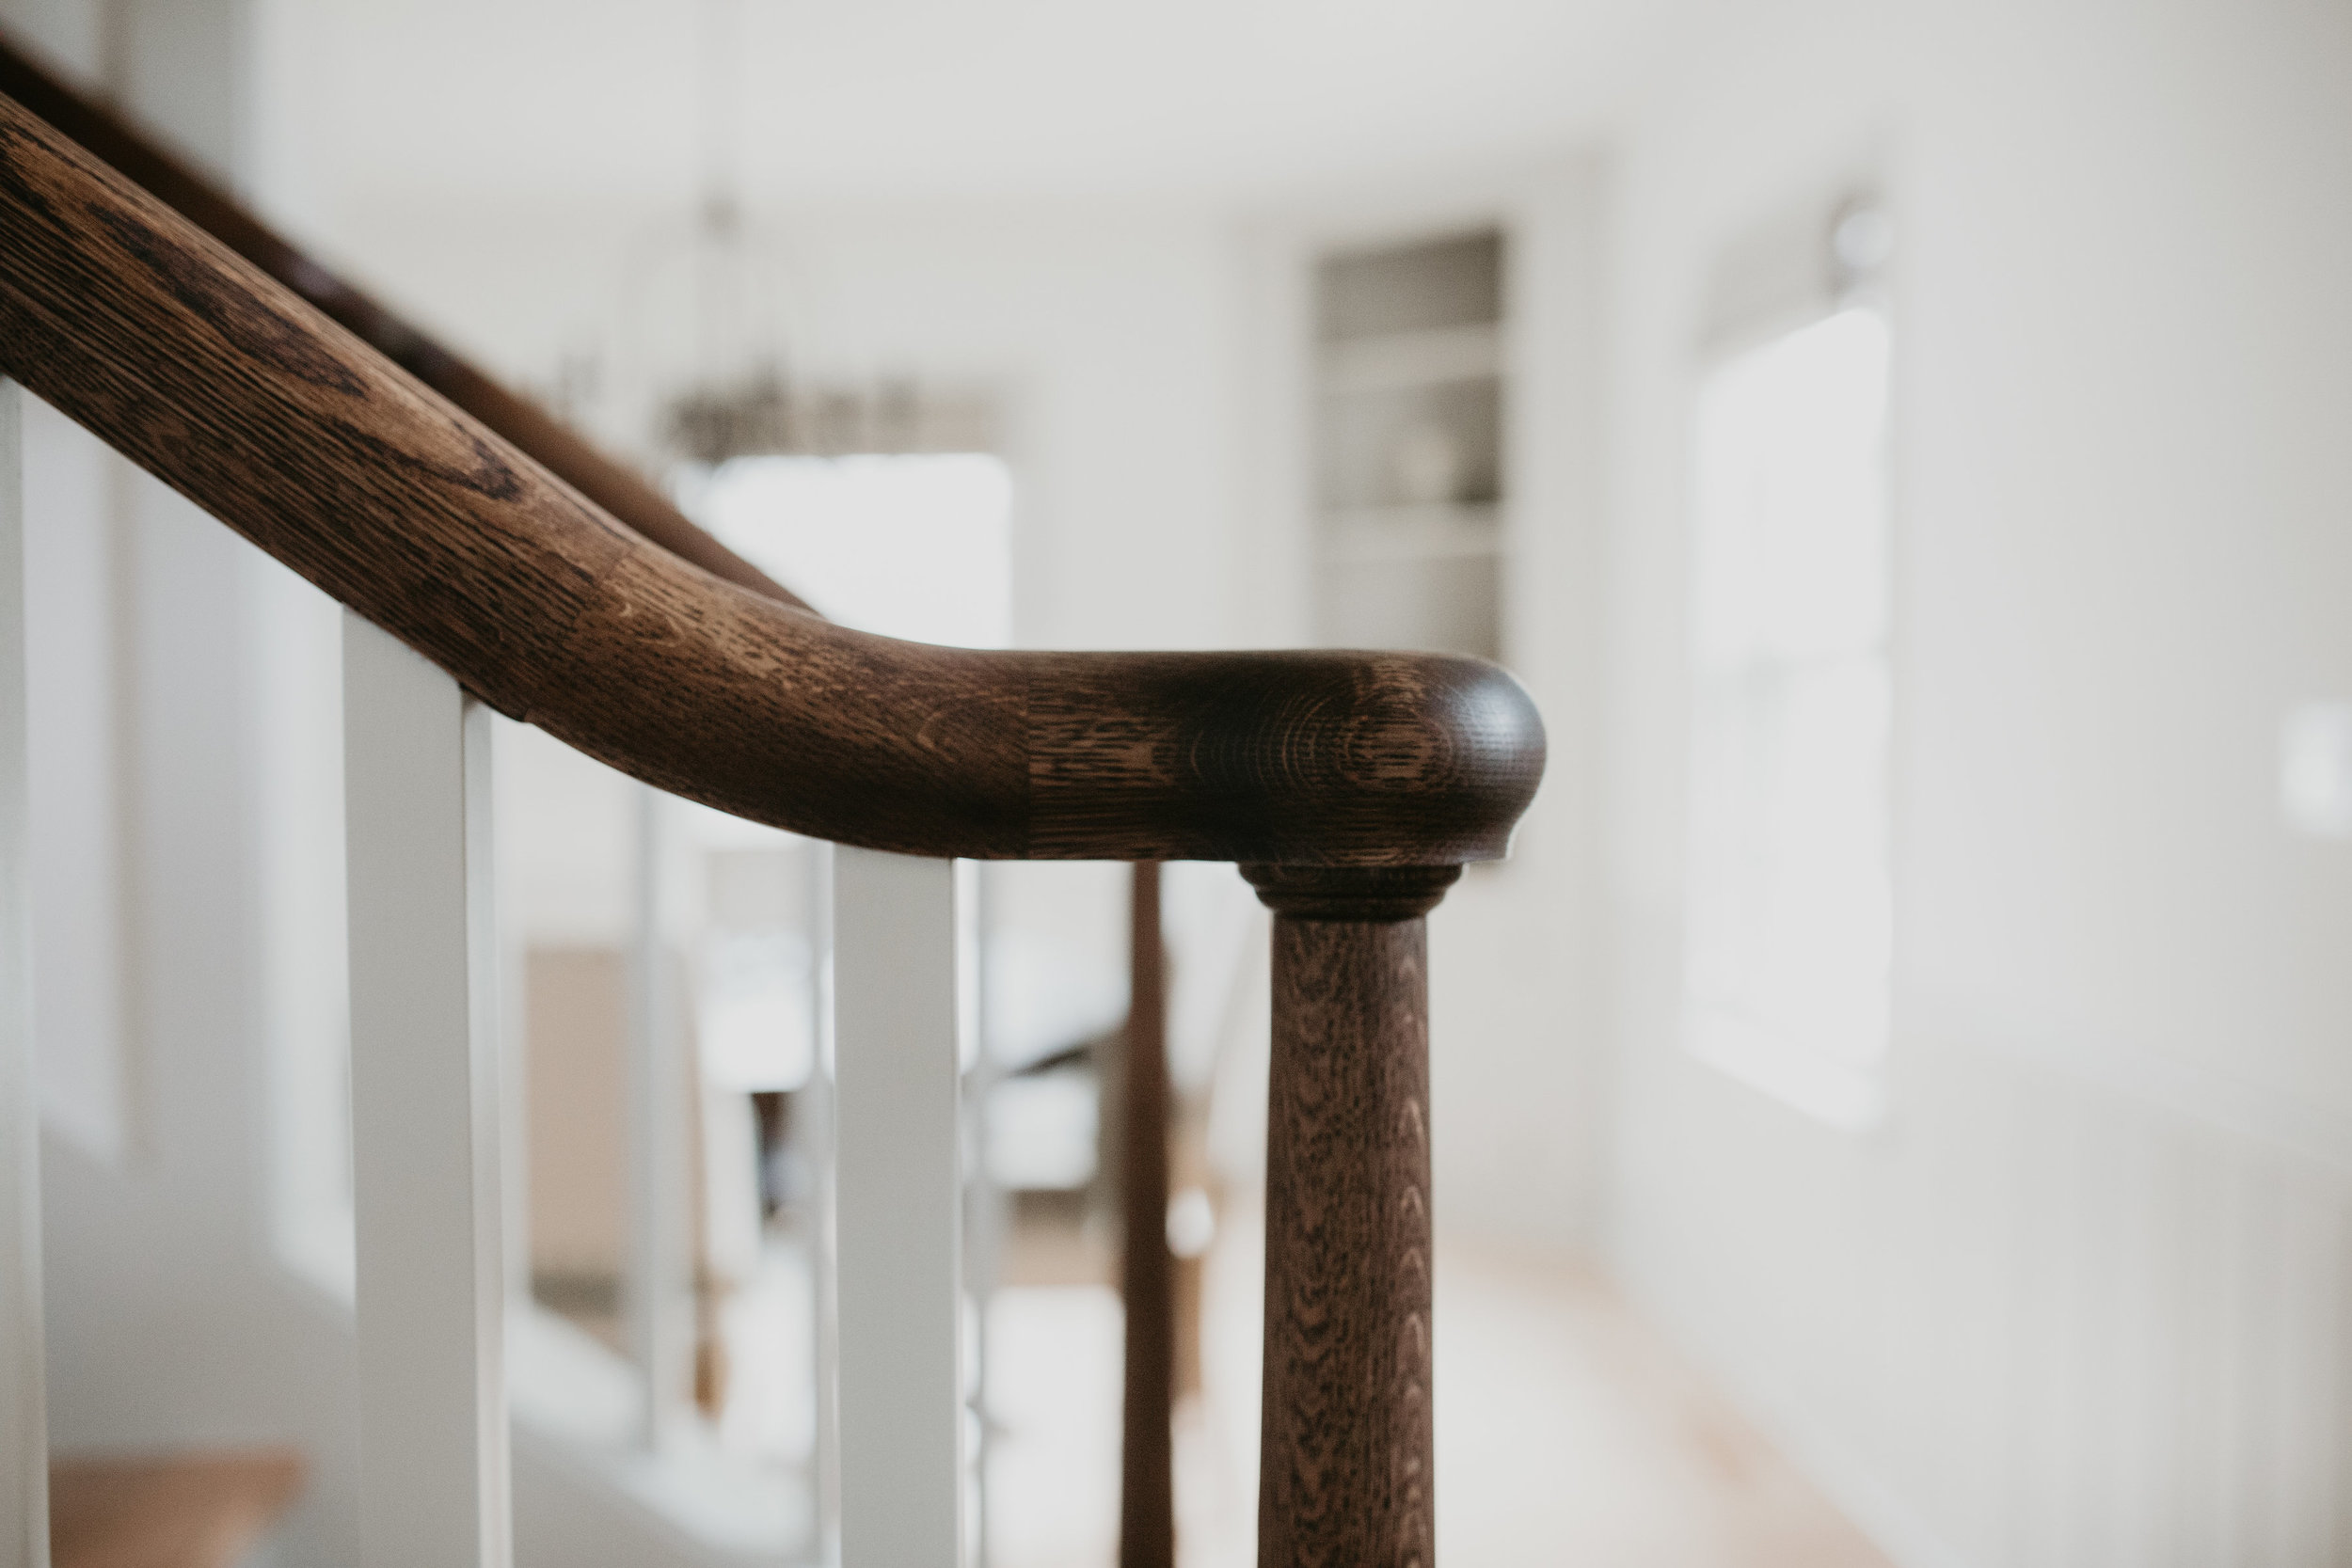
hand rail
stained railing
built-ins

We refinished the wood floors (original fir) and used a product from Bona that almost bleached them out, it took any orange out of the wood.  For you locals, Adam Best weaved in new fir and refinished the existing wood.  He did such a great job!  The floor looks perfectly worn and natural!

sunroom
sunroom2
window

This little sunroom off the side of the house was in pretty rough shape.  New tile floor, new trim, new paint and now this just might be the cutest room in the house!  I love how the owner's turned it into a little office/art space....so cute!

Living Room
Living Room1

Old home charm with all of the modern amenities that we all love!  It was a pleasure to work with these clients and an honor to get to leave our mark on this old charmer.  

xoxo,

Darci

PARK DRIVE || renovation in McMinnville - bathrooms

This old home is such a gem!  All of the character and quirks we love about old homes, yet completely updated with modern conveniences....the best of both worlds!  As I mentioned in my last post, the clients purchased this home with the intention of renovating and turning into a vacation rental.  It's just a charmer and so well appointed!  I wish them much success in their endeavors! 

powder room
Powder Room Sink

One of my favorite spaces in this old home is the new powder room!  This room required the skills of a lot of different men!

The plaster walls are gorgeous!  We used a gentleman (Bravura Finishes, out of Lake Oswego- for you locals) and he is truly an artist.  He made a couple of samples up based off of inspiration photos, and the end results are truly stunning.  Such a special feature to have in a powder room!
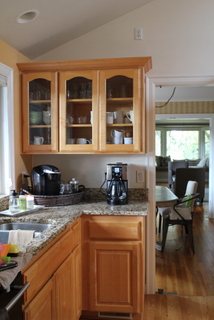
The hardwood floor installer/refinisher did such an amazing job on the floors.  Our plumber did a fantastic job of setting the plumbing - there was no room for error and he nailed it!  The handsome contractor on the job did a pretty fantastic job of making sure all of the little details were in place and doing all of the "extras". I've said it before, but he's a keeper!

Upstairs Bath

This is the smallest of the 3 full baths.  Neutral stone, classic fixtures and a fun shower curtain give it a lot of personality!

Upstairs master
Upstairs Shower
Upstairs shower
ParkStHome-101.jpg

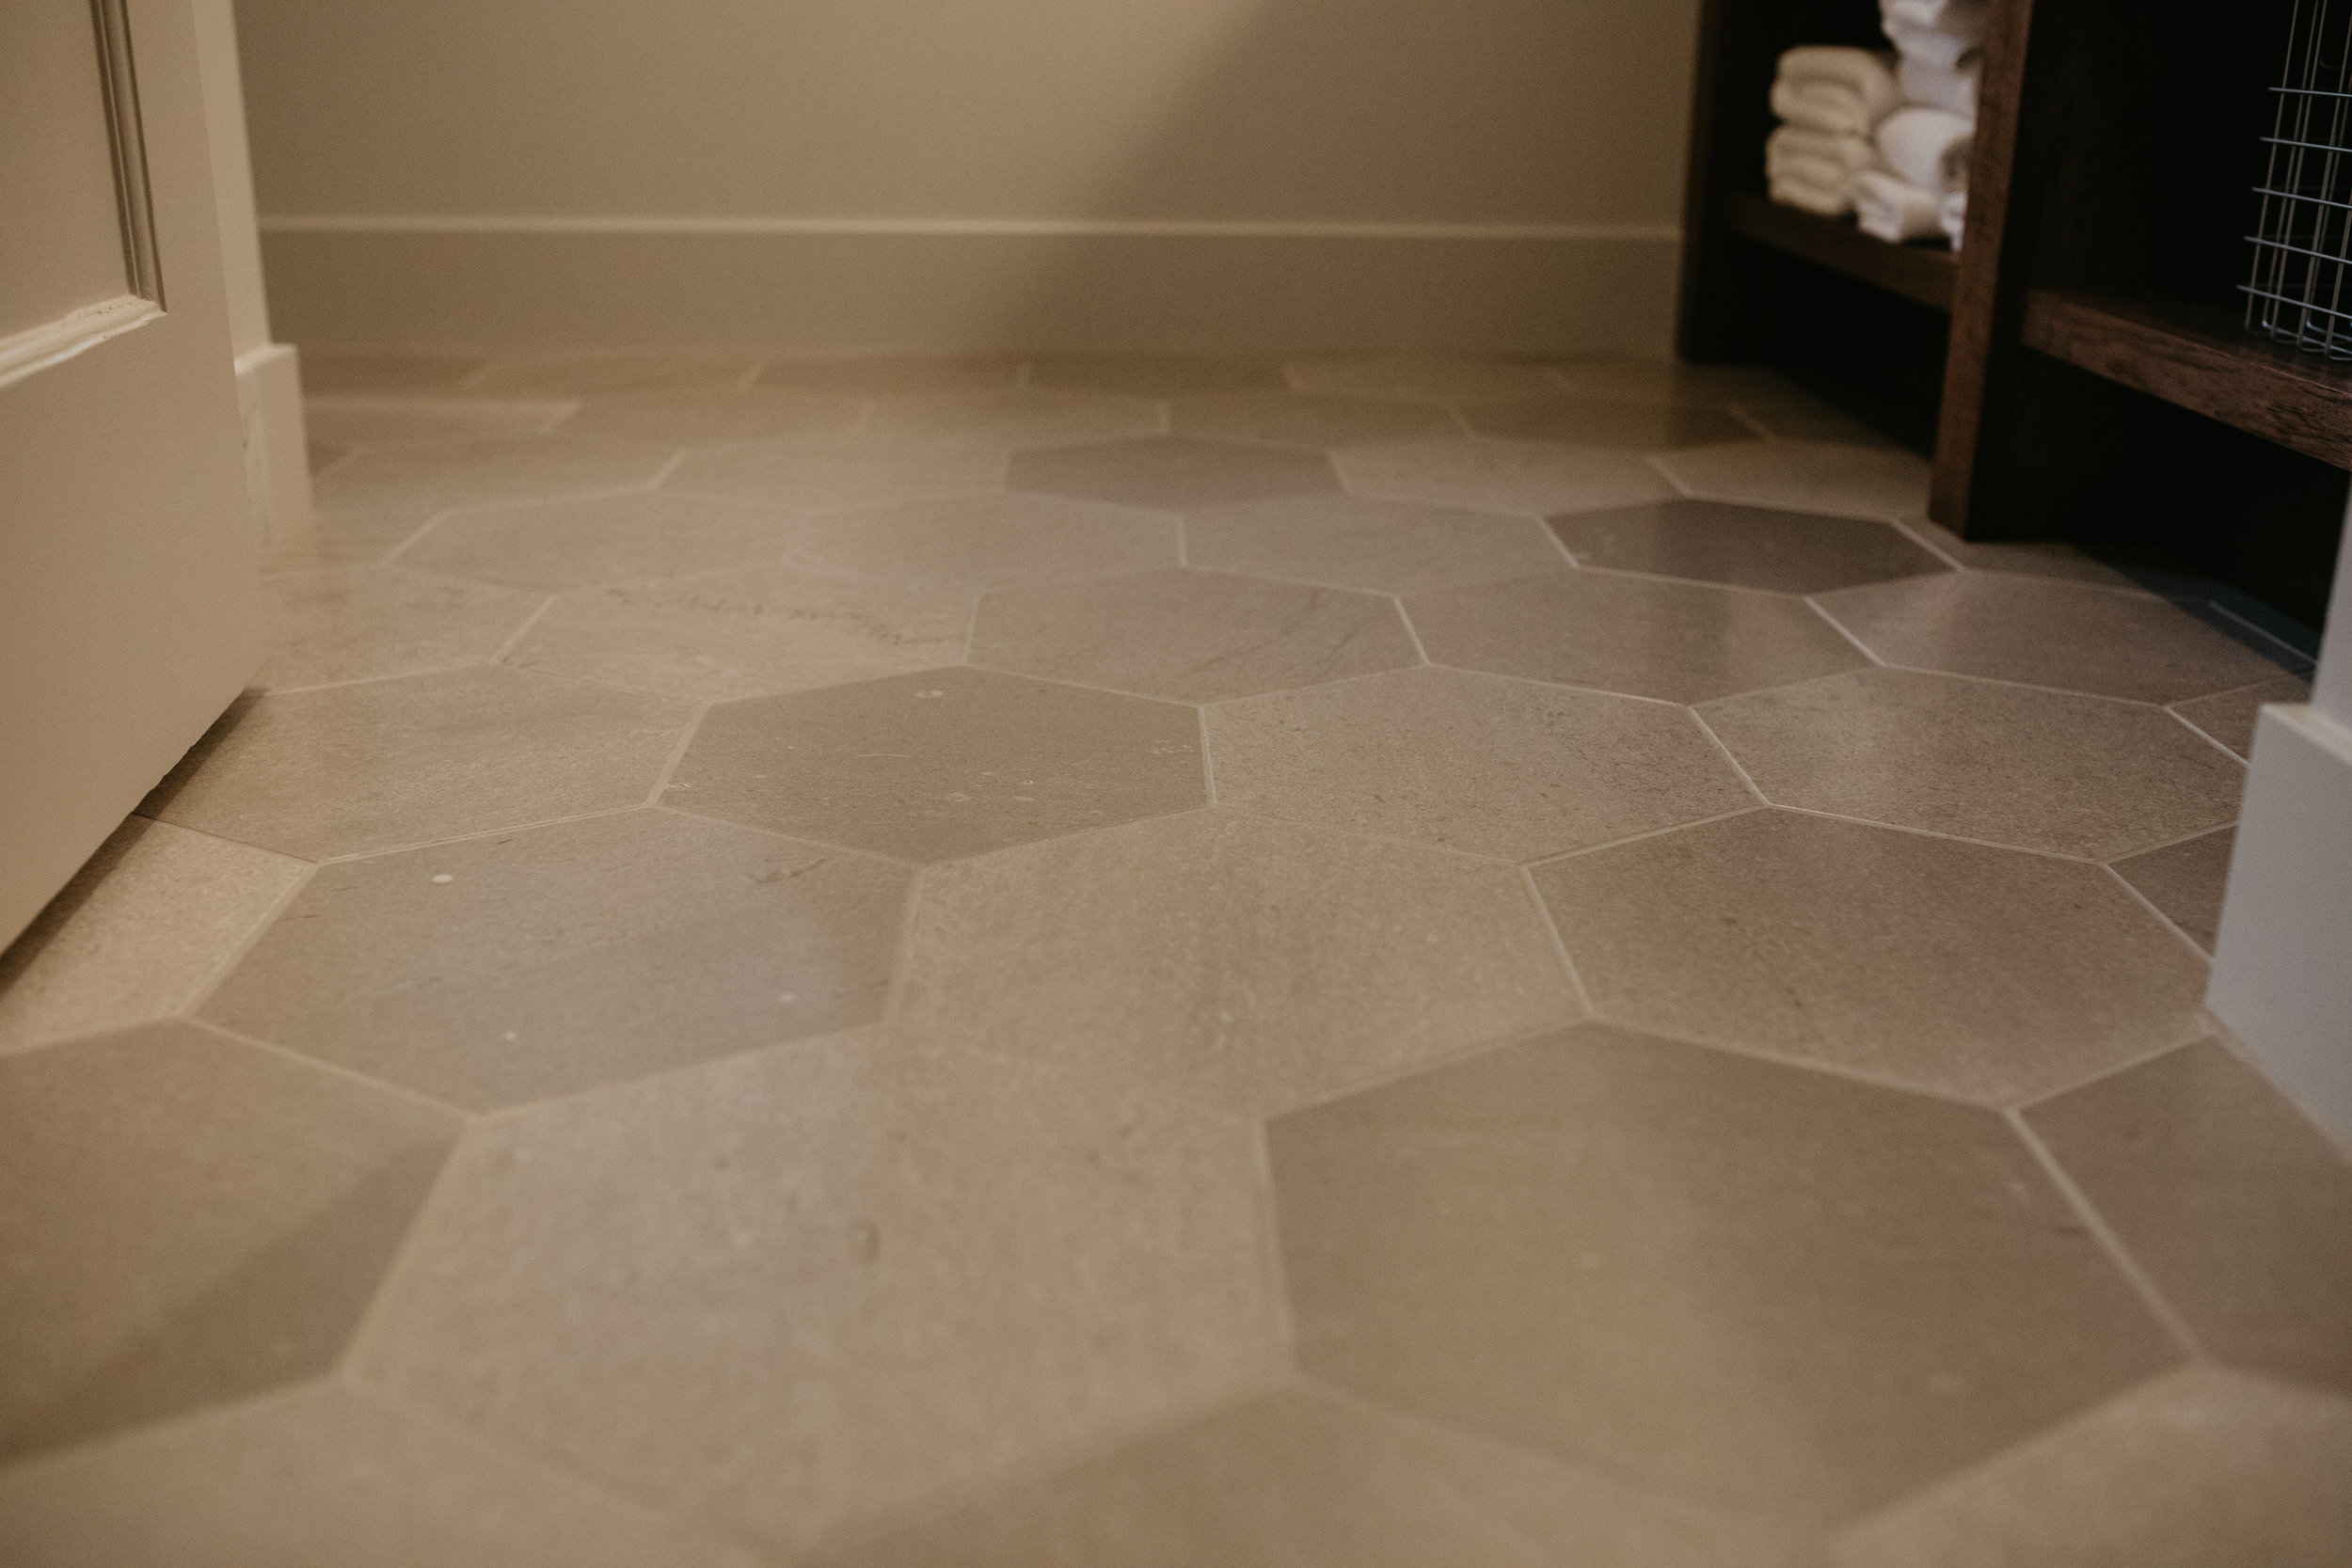
This upstairs bathroom is a lot of beauty packed in a fairly small space!  Matt built this vanity and I love it....simple and yet classy.  The open shelving makes it easy to grab things not to mention all of the saved space by not having to open cabinet doors.  The toilet is tucked behind the little pony wall for privacy and the shower looks and feels like a spa!  And just look at these fun floor tiles!

downstairs shower
shower door
cabinetry

The bathrooms in this home were definitely a labor of love!  The owner had a great vision for how she wanted the home to look and feel!  Matt had the creativity and skills to make it happen and I just can't get over how beautiful it all turned out!  I still have a few more rooms to show you next week.....thanks for following along friend!!

PARK DRIVE || renovation in McMinnville

KITCHEN || before + after

About 1 1/2 years ago, we met the nicest couple who fell in love with this little corner of Oregon.  Who wouldn't?  It's so beautiful out here with the mild seasons and rolling hills of vineyards and farmland!  Anyways, this couple is incredibly kind, very creative, inspiring and ambitious!  It was a joy to work with them and we wish them so much success with their hospitality ventures here in Yamhill County.

Also, the credit for these beautiful "AFTER" photos goes to my super talented photographer buddy, Brittany Rossman.  She has a way of capturing families and spaces beautifully, and she is so easy to work with, she is a sweetheart, a hard working mama, I could go on and on :)

The owners purchased this little gem in the heart of downtown McMinnville, it's within walking distance to wineries, tasting rooms, restaurants, boutique shopping and much more.   Matt had the pleasure of working his magic on it and it sure turned out beautifully..... 

BEFORE

BEFORE

AFTER

AFTER

Don't we all love the curb appeal of old homes?  Classic architecture that you just don't see in most new homes!!!  You don't notice much change from the outside....it still has the darling "old home" features.  There is a new front door, new lighting, new landscaping and the addition off of the side is completely re-built.  The owners had the back yard landscaped and it is such a beautiful space, perfect for entertaining or sitting around the table talking late into the night!

BEFORE: kitchen

BEFORE: kitchen

AFTER: kitchen

AFTER: kitchen

ParkStHome-71.jpg
ParkStHome-68.jpg
ParkStHome-57.jpg

I would say the cabinetry is one of my favorite features in this newly designed and remodeled kitchen.  It's all of those little details that really add up to the overall feel!  The inset doors, the molding details, the toe kick, when it's all thought through it really completes a space!  The cabinet color is SW Supreme Green, it's a fresh and soft minty green.  The countertops are a quartz, such a great option for any kitchen, but especially a vacation rental.

ParkStHome-91.jpg

This darling little island is actually built-in and has an electrical outlet.  There wasn't the room for a large island, but the space was too big to not have anything in the middle.  Having power at a small island like this is so convenient!  Matt used some hickory he had at the barn and stained it dark, to match the floating shelves.  And just look at.....I love how the owner slid two bar stools under the island so you can chat while working.
ParkStHome-92.jpg
ParkStHome-5.jpg

I hope you enjoyed this little bit of kitchen inspiration!  I will post some pictures of the bathrooms soon.  They are calling for snow and ice tonight so I am getting ready to make some soup and snuggle with my favorite people to watch the snow fall.  Have a wonderful week friends!  If you have questions about specific finishes, please feel free to email or comment.

Love,

Darci

PAINTED CABINETS || a review of our cabinets painted with Annie Sloan Chalk Paint®

Painting your own cabinetry is such a great way to completely change the look of a room for very little money!  As you know, my dear hubby builds beautiful cabinetry and finishes them in his spray booth with some fantastic products he buys from our local Rodda Paint store.  I am a firm believer that Chalk Paint is not for every job, and I am the first to tell customer that!  However, it is a fantastic option for DIY and of course it's amazing for decorative finishes!  I thought it might be helpful to give a little review of our kitchen cabinets I painted 3 years ago with Annie Sloan Chalk Paint®

IMG_4814.JPG
IMG_4815.JPG
IMG_4820.JPG

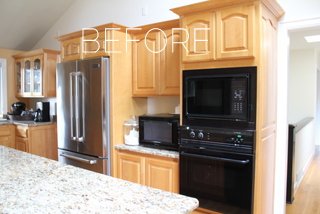
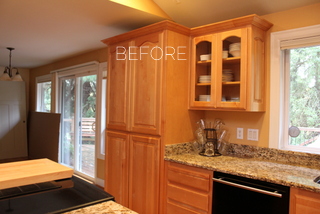
When we first moved in, the walls were yellow and the cabinets were a shiny maple.  When we bought our home, we had intentions of remodeling within 2 years....we just passed the 4 year mark :)  I just wanted to make the kitchen feel a bit more "me", even if it was a temporary fix!

IMG_8396.jpg

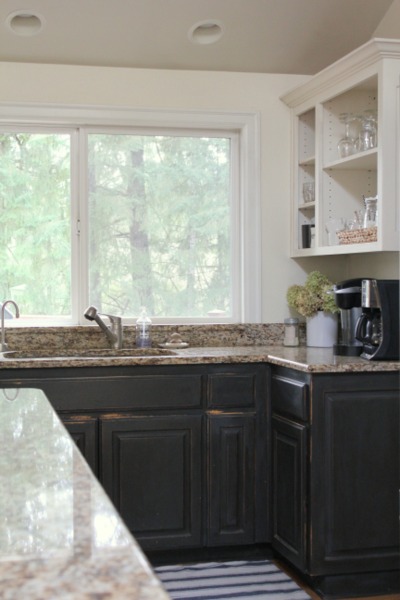
I painted everything, except the uppers, Annie Sloan GRAPHITE.  I wanted the black appliances to  blend in and I love how the black hides everything :)  I painted the uppers Annie Sloan OLD WHITE and sealed with 2 coats of CLEAR WAX.

To prep the cabinets for painting:

Clean the surface with a degreaser, then wipe the surface down with warm soapy water.

Lightly sand the surface. You are not sanding to remove any finish, just sanding lightly to give the paint a little something extra to stick to!

Apply 2-3 coats, depending on the color of paint and the color of existing cabinetry you are covering.  

Seal with 2 light coats of Annie Sloan Clear Wax, lightly buff away excess wax.
Enjoy!  To clean, wipe down with a warm rag.  I use Murphey's Oil Soap when they need a good scrub.

IMG_8398.jpg

I lightly distressed the edges of my doors and cabinet faces.  I wanted a bit of a distressed look.  I then sealed everything with 1 coat of dark wax.  I recommend 2 light coats, but I was going for a temporary fix and didn't want to put in the effort of applying a second coat of wax! 

IMG_8402.jpg

So, 3 years later and here is my humble little opinion.....

This kitchen gets A LOT of use!  I enjoy cooking and baking and so do my little peanuts!  We cook most meals at home and we love feeding other people so this little kitchen gets a lot of use.  The paint is chipping in the "usual" spots....the cabinet the houses the trash can!!  Also, our cabinet that houses the cutting boards and baking sheets has a little extra chippy factor happening.  If I had knobs, there would be very little chipping!  Plus, I am just plain hard on it because I am hoping that one day my dear hubby will build me some new cabinets! :) The rest of the kitchen looks just as good as the day I finished painting.  It really has held up so well!

IMG_8411.jpg

I have sold Annie Sloan's incredible paint for 5 years now!  I sell it because I believe in it....it's such a fantastic product!  It makes DIY cabinet painting attainable for anyone!  It's forgiving and provides a beautiful finish.  I could go on for hours!  So, if you are on the fence about painting your cabinetry....I say go for it!!!!!!  With a little bit of money and a lot of elbow grease, you can completely change the look of your space!  

IMG_8414.jpg

I sure hope you found this helpful!  You can always email or call the shop and we are more than happy to answer your questions!  And, be sure to share pictures of your painted cabinets....I LOVE to see before + after photos!!

love,

Darci

Valentine's Day || at the shop

I hope your New Year is off to a great start!  I'm sorry it's been so quiet here on the blog lately.  We have had some really exciting things happening behind the scenes with the construction company and with the shop, I just haven't made the time to write about them!!

IMG_7085.jpg

One of the most exciting things on the shop front, is adding a dear and very talented friend  to our team!  We have been friends for 10 years or so and we often joke that she is my "sister from another mister".  Two peas in a pod...you know what I mean?? :)  Well, she is helping with events at the shop and I couldn't be more excited!  The first little event will be our Valentine's Day celebration at the shop!  Here are the details....

Join us Saturday, February 10th from 10am-5pm as we show YOU, our amazing customers a little extra L O V E.

  • Free craft and snack for the kiddos from 10am-12pm (parent doesn't have to be present but they must be at the shop :)
  • Refreshments for you to enjoy while you shop.
  • A free Spring scented candle with each purchase over $50.
IMG_7268.jpg

We will have free crafts and snacks for the kiddos from 10am-12pm.  Of course that doesn't mean "drop your kids and go" but it does mean we are so very happy to love on them while you enjoy some time looking around the shop.

IMG_7273.jpg

We will have yummy treats for the kiddos and refreshments for you while you shop.  We are also giving away a yummy Spring scented candle for every purchase over $50.  

Just some fun little ways that we can show you a little extra love for Valentine's Day!

MAKER'S MARKET || at the shop

MakersMarketGraphic.jpg

I am so excited to host our first Maker's Market!!  We are moving the shop all around and will have 5 different and very talented creatives who will be selling their handmade items.  I am hoping it will be a really fun, cozy and unique shopping experience!  A way for customers to get a head start on their Christmas shopping and a way to showcase some talented, local ladies!

FALL ENTERTAINING WORKSHOP + DINNER

welcome

Just a little over a week ago, I hosted our 3rd annual Fall Entertaining Workshop + Dinner!  I am the worse at taking pictures, but I did snap a few right before the ladies arrived......

chalkboard
garage
house

I really wanted to host the ladies outside, in our back yard.  Would you believe the entire week was just beautiful.....sunny and 70's.  Friday morning, the rain came!  It was gray and wet, but the clouds started to lift later in the morning, just as the weatherman said!  It turned out to be such a lovely evening, just enough chill in the air to make it feel like Fall!

barn
yard
houseandtable

We made a darling Fall banner out of vintage book pages.  Even the so called "non-crafty" ladies enjoyed making their banners and they turned out so cute!

We talked about the heart of hospitality, having grace with ourselves, and practical tips for entertaining and hosting.

set table
bags

Each lady received a goody bag to take home  A local soap maker (Rough Cut Soap Co.) made the most beautiful soap to add to each bag, a very generous gesture that meant so much to me!

tableinyard

We enjoyed home made sweet potato + black bean salsa with tortilla chips and chilled white wine while we chatted.  For dinner, the ladies were served butternut squash + black bean chili, buttermilk biscuits, and honey crisp apple salad.  After their bellies were full, coffee was served as well as vanilla ice cream over caramel apple crisp.  

It was such a fun evening with such a fun group of ladies.  I am so thankful for the opportunity to get to host classes and meet so many incredible ladies!  I hope you and your family are enjoying Fall and looking forward to opening your home to family and friends.

THE HISTORY OF OUR LITTLE COTTAGE

38a00088d26ae3ce968ccec9ef41f0c0.jpg

I get a lot of questions about our little cottage so I thought it would be fun to write about and reminisce a bit :)

This is what our little cottage looked like when we bought it, 9 years ago...before the term "fixer upper" was so popular!  We really didn't have a rhyme or reason when we bought this house, in fact, we had two other houses just two blocks away for sale!!  I had always loved this little home and thought it would make the sweetest little flower shop or bakery or something charming.  Well, to turn a long story short, we turned out other two homes in Carlton into vacation rentals and moved into this charmer until we could save our pennies and fix her up.


159a00ef34228d74e195ff0da51705bc.jpg

Fast forward two years and our little fixer upper made it on the cover of This Old House magazine!  The interior was still a dump, but we got the outside looking pretty.  After This Old House featured our home on the cover, they ran a couple of other stories in future issues about the upstairs renovation we completed.  


Mar12-cover-lg.jpg

When we moved to interior renovations, we converted un-used attic space into a master suite and home office.  Our friends and family were so gracious to come over....I think back on dinners, parties and events I hosted and I laugh!!!  The downstairs was SO GROSS!  Funny too because the upstairs was featured in This Old House and an episode on HGTV while the downstairs was so yucky! 

232323232fp53258nu324725967WSNRCG34-732483327nu0mrj.jpeg
04-attic-remodel.jpg
06-attic-remodel.jpg
Bang_For_Your_Buck_hgtv.jpg

So fast forward another 2 years or so and all we had left to remodel was the kitchen and laundry area.  I was pregnant with Addilyn when we started that phase of the remodel!  First baby!!!  Oh I couldn't wait to make the house cozy and have a sweet little baby as part of our family.  My sweet little Addilyn Mae was even born at this house!  Half way through my pregnancy I decided to have a home birth, obviously that's an entire story in its self!  But to be able to cozy in by our fireplace with the snow falling outside and hold my newborn baby (just hours old) was just magical.


MDHaneyFall-3.jpg

After almost one year of living in the cottage as a family of three, we decided to move into our other home in Carlton.  It was better suited for a family so we turned this little home into a vacation rental.  Over the past five years it has also served as my paint + creative studio as well as hostess to serval creative events!

MDHaneyFall-26.jpg

Now she is back to full time vacation rental status ;-)  My mom cleans for me and my mother-in-law graciously offers her Wednesday afternoons to help in the garden.  I still manage and my favorite part is definitely getting it ready for guests.....home baked treats, fresh flowers and lamps on so it feels cozy for the guests!

Thanks for letting me tell the condensed version of this story!  It's so fun to look back on past projects and seasons of life!  This little cottage holds a special place in my heart!

BACK TO SCHOOL || and workshops for Fall

shop2.jpg
shop1.jpg

A touch of Fall is in the air and school started this week, which means I am excited to host some workshops and events over the next few months!  Today I hosted the sweetest group of ladies at the shop.  They enjoyed a boxed lunch while I talked about Annie Sloan's soft wax.  After their lunch, we played with Annie's dark wax and the waxed these little signs.  It was a fun way to show how dark wax can be used on raw wood, instead of using stain!

We have some fun workshops and events lined up for you local friends.....

September 29th, 5:30-7:30pm we are hosting our 3rd annual Fall Entertaining Workshop + Dinner!  I am so excited about this year's workshop because I am hosting it outside in our front yard!  We will eat, drink, craft and just have a fantastic evening together!  HERE are some pictures from last year's event.  If you are local, we would love to have you join us!!

October 13th, 5:00-7:30pm we are hosting our popular Chalk Paint BASICS class!  This class will include a Fall craft that we work on and then take home.  It's a fun way to learn all about Chalk Paint and get to create while we learn!

November 4th, 10am - 4pm we are opening up the shop doors to local creatives and hosting a MAKER'S MARKET.  A fun way to start off the holiday shopping season!! Think old school holiday bazaar stepped up a notch :)

And, on a personal note.....by babies started the new school year this week!


a1.jpg

^^ My Addilyn Mae started 1st grade on Wednesday! ^^ 

And our sweet Savanna started Pre-School on Thursday!  Just 2 mornings a week, but she has always been my little buddy and constant companion.  I kept myself busy Thursday morning so I wouldn't have time for tears :)

savi1.jpg

We had the best summer and we enjoyed every last minute of it!  However, now that school has started, up I am so ready to spend more time at the shop and planning for fun things ahead!

Happy weekend friend!

APPLE BREAD || a sweet recipe

apple bread

A couple of days ago, the girls and I took a dear friend out to pick apples at my grandparent's old farm.  We picked a big basket full of beautiful, tart, green apples.  I plan to make some applesauce, but sweet apple bread was calling my name :)

apple bread

One of my favorite resources for tried and true recipes is Jenny Hobick's blog, Everyday Occasions.  I have been following her blog for years and every recipe turns out so good!  I made a couple of modifications to her recipe....I only had 1 cup of granulated sugar so I used 1 cup of brown sugar and 1 cup of granulated, and I baked my bread for longer!

APPLE BREAD

4 small or 2 large loafs

2 Eggs
2 cups Sugar (or 1 cup Brown Sugar and 1 cup Sugar)
1 stick of Butter (melted)
2 teaspoons Vanilla
2 Apples, peeled and diced
2 cups Flour
1 teaspoon Salt
1 teaspoon Baking Powder
1/2 teaspoon Cinnamon
Powdered Sugar

Preheat oven to 350 degrees.  Prepare loaf pans by lining them with parchment paper, or greasing with butter.

In a mixer, combine eggs, sugar, butter and vanilla.  In a separate bowl, stir together flour, salt, baking powder and cinnamon.  Add flour mixture into the butter and sugar mixture slowly.  Add apples in and stir just until combined.

Pour batter in the pans.  

Bake for 30 minutes, or until tester comes out clean.  Cool in pan for 15-20 minutes, then move to wire rack.

I love that it makes 2 large loafs, 1 to enjoy warm out of the oven and the other to give away!

bread packaged

This is the best sweet bread I have had in a while, it's so good and so easy!!!!!  The perfect after school snack or lazy Saturday morning breakfast bread :)

Enjoy!!!

SUMMER BREAKFASTS OUTSIDE || it's the simple things

breakfast

It's hard for me to believe that July is almost over!  This summer has been so good....nothing spectacular,  just simple and sweet.  The girls and I have had breakfast (almost every day) outside this summer (summer weather in the Pacific NW is the BEST!!)  It's such a simple thing, but this act of enjoying a slow breakfast, outside, has been such a great way to start each day!

School will start soon and I know the mornings will be busy and rushed.  I am savoring these slow mornings of summer and hope you have the chance to do the same.  It's just taking the time to relish the simple things!

PS-these darling mugs, bowls and napkins are all available in the shop!  It makes setting a simple breakfast table seem a bit more special when you have fun dishes and linens!