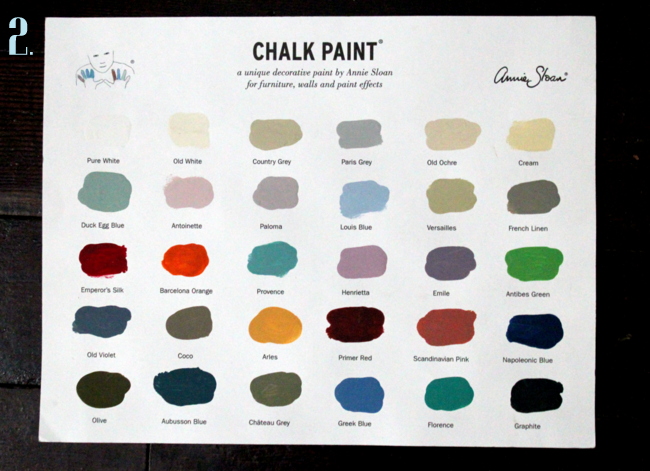
CHALK PAINT® CLASSES :: what's the difference?

Hello and happy {rainy} Thursday!

This is what has been consuming my extra time lately….

IMG_3741

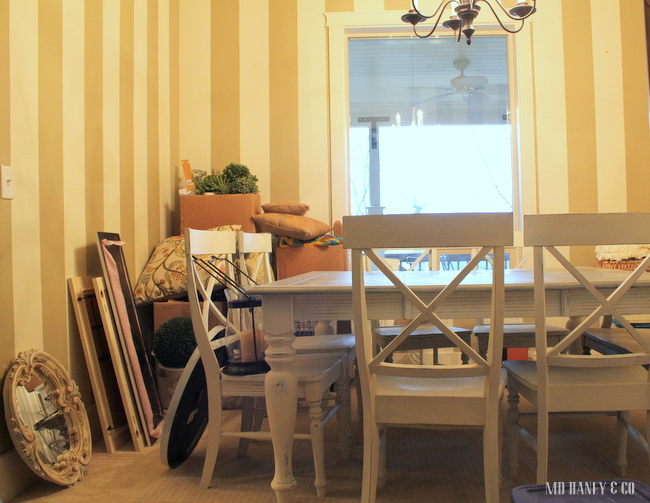
Packing, cleaning, and organizing.  It feels so good to go through everything!

IMG_3740

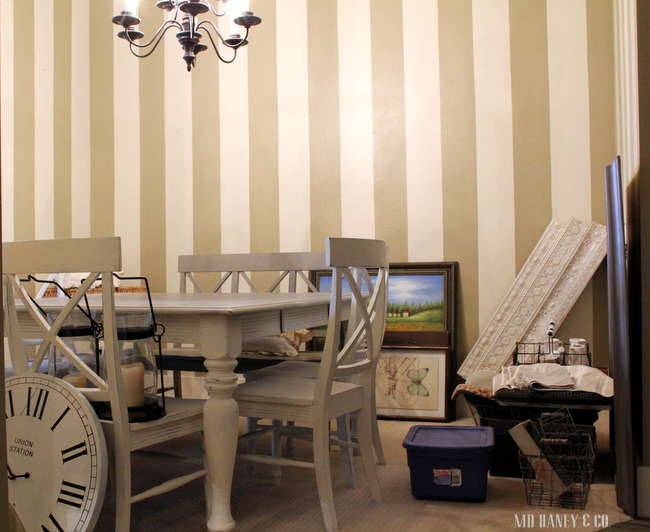
I am using the dining room as my packing and sorting room.  If I don't love it, or haven't used it in one year, it's donated or put in the garage sale pile.  It's hard to stick to my rule!!  I am always thinking 'someday I might use that'.  Yesterday,  I took six huge bags or little girl's clothing to the Blessing Room….and I still have two bags to give away and several outfits to sell at the garage sale! It feels soooo good to simplify!!

IMG_3742

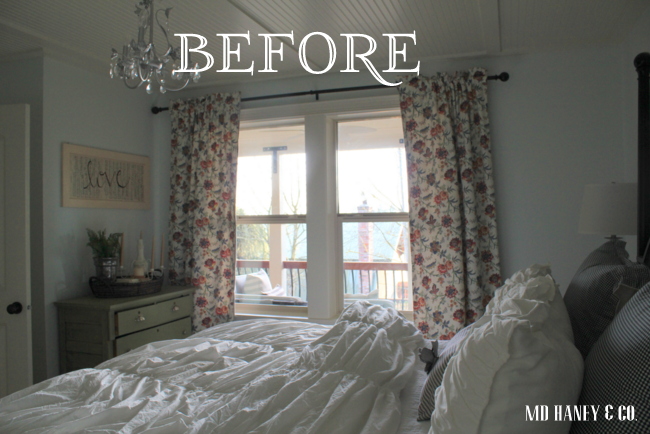
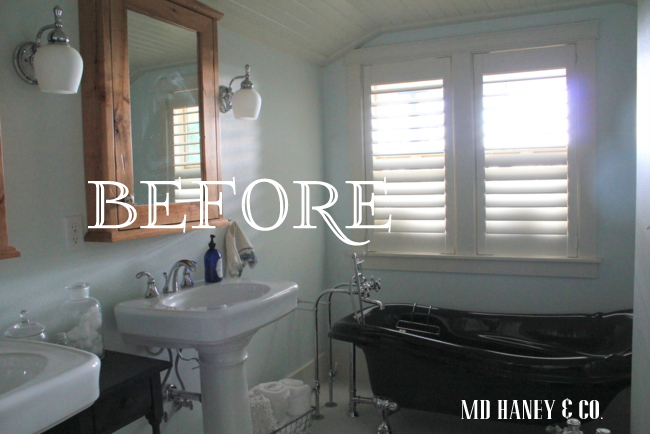
Speaking of simplifying, some areas of my home are looking pretty bare!  I am having a garage sale tomorrow, and the buyers are coming by to see if they want to purchase any of our furniture.  My goal is to hardly move anything…..either sell it or donate it!

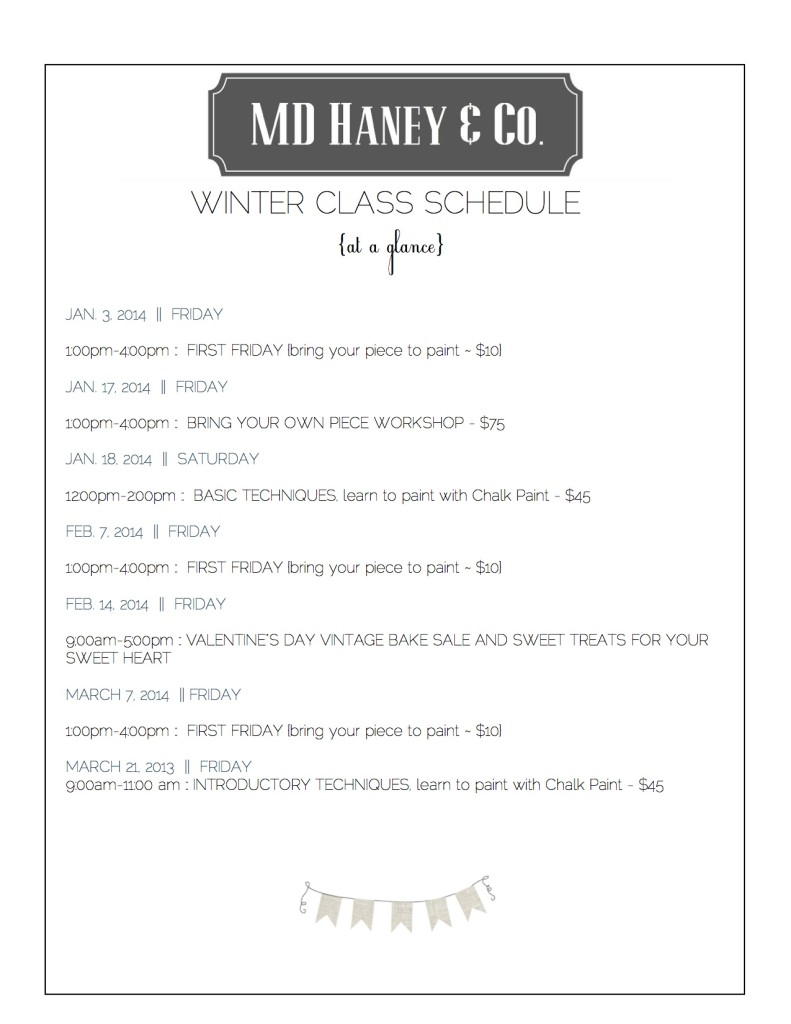
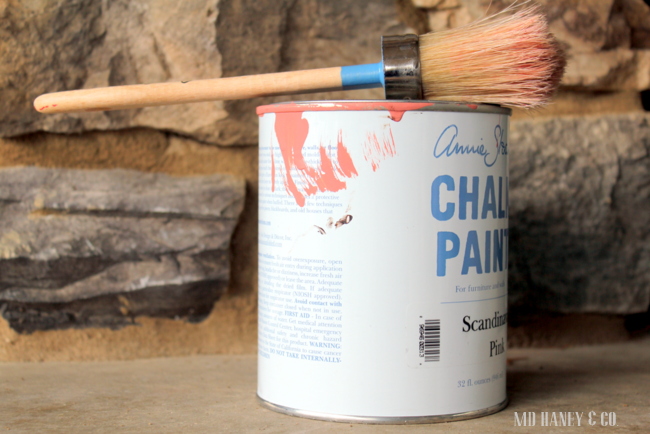
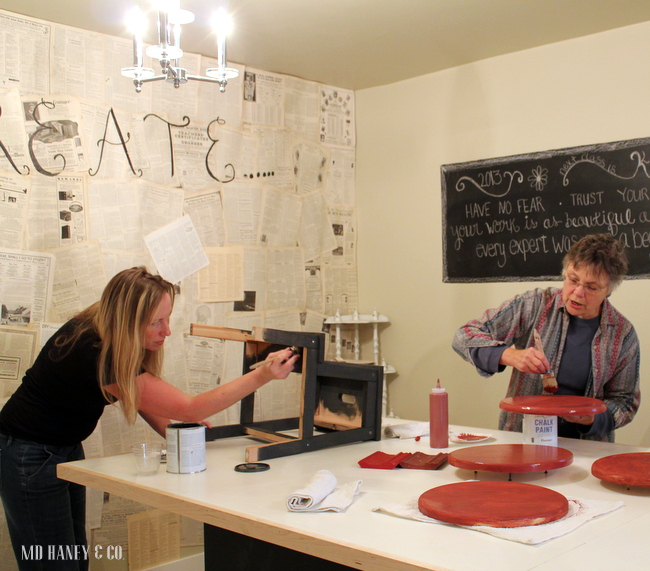
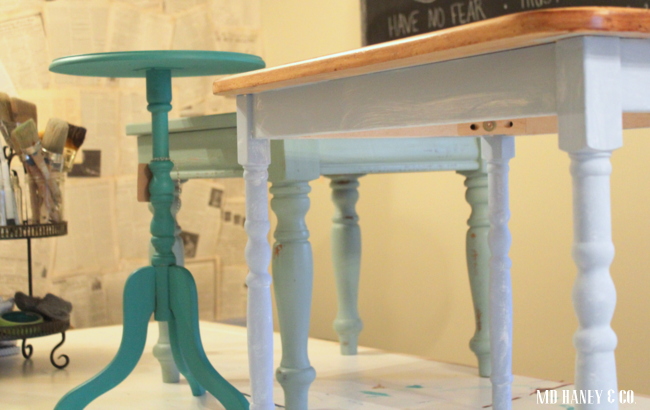
So, the point of this post is not to talk about me, but to explain the different Chalk Paint® classes and workshops we offer.  I get quite a few customers asking about the differences.  Good question!  Below are descriptions for our most popular classes.

bannerlinen

First Friday {which I am going to change to every Friday starting in March}!

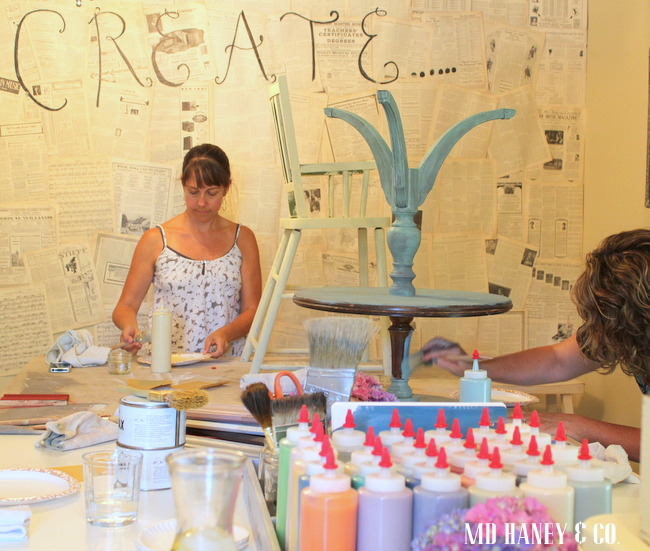
The first Friday was something I started this year, and people seem to really love it.  As of March, I am going to offer this every Friday, instead of just the first Friday of the month.  I will be calling it OPEN WORKSHOP.

IMG_3532

OPEN WORKSHOP is where you can bring your own project to paint, in our workshop.  We open our workshop from 1pm-5pm on Fridays.  

You bring your own paint and wax {or purchase when you arrive} and you can use our workshop space, brushes and tools.  I am happy to offer tips and advice, in between helping customers.  You can stay for the entire 4 hours, or just pop in for 45 minutes.  The goal is to provide an incentive {a fun and creative environment} for you to just start painting!

I have light refreshments and the cost is $10.  You don't need to rsvp, but just know we only have space for 5-6 people at a time.

IMG_3699

BRING YOUR OWN PIECE

BYOP classes are offered once a month.  The class lasts 3 hours.  Here we guide you through the steps to paint and finish your own pice of furniture {a tray, box or shelf are great, nothing larger than 2 feet wide or 2 feet long.}  We teach tips and tricks and help to build your confidence.  We provide the paint, wax, brushes and tools.

Light refreshments, drinks and a tote are included.  The 3 hour class is $75.  You do need to rsvp for these classes, the maximum number of attendants is 6.

IMG_2987

INTRODUCTORY TECHNIQUES

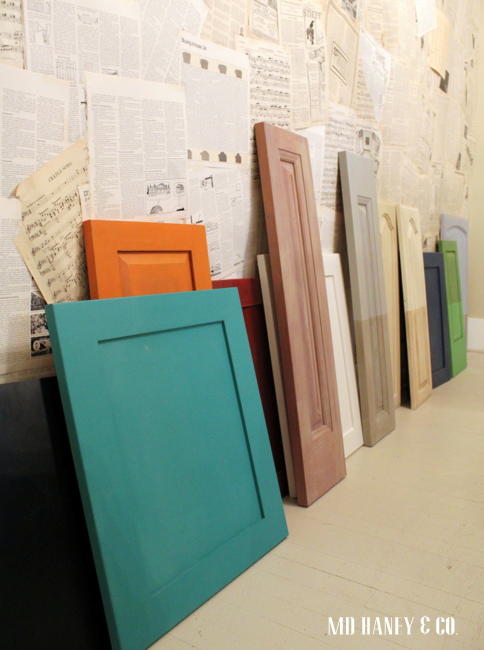
This is a fun class, meant to inspire your creativity and evoke confidence.  You will learn four techniques to understand the basics of this unique paint and proper wax application.  You will learn tips to achieving beautiful results on all of your painted projects.   You will paint and wax molding pieces that are yours to keep.

Light refreshments, drinks and a tote are included.  The 3 hour class is $75.  You do need to rsvp for these classes, the maximum number of attendants is 6.

To sign up for classes, you can call {503.857.8176} or send a note via our contact page.  I will send you detailed information about the class and add you to the list!

Happy Painting!

JANUARY :: a busy month

IMG_3223.jpg

Hello and thank you for bearing with me as I only posted once last week!  I probably won't post much for the next 3-4 weeks, I will be a little busy ;-)

exterior

My to-do list includes….

Packing, purging and cleaning our house….and a garage sale this weekend!

Turning our Main Street property back into a vacation rental.  {More on that soon ;-}

Packing up my design studio, I am moving the studio in 3 weeks!  

Updating the website with all of the changes.

Still working on design projects for clients, keeping my children alive and still trying to keep our home somewhat livable.

exterior

I love the challenge and I am super excited for this next phase.  I can't wait to fill you in on all the details!

IMG_3053

Until then, don't hesitate to call if you want Chalk Paint, I am still happy to meet you if Fridays don't work.  I have the best customers….thank you and I can't wait to share all of the new changes with you!!

cupula

I will be back soon!

xoxo

JANUARY GIVEAWAY :: a giveaway each month in 2014

Good Monday morning and Happy New Year!  I think with the new year right around the corner, it's a good excuse to start having monthly give aways!  Right?!?  I love to give gifts and I know we all like receiving them.    My customers and clients are the best.  Seriously, you guys are so supportive and I appreciate your business and the opportunity to get to know you!

Plus, it's an excuse to get more Chalk Paint® into the hands of my lovely customers!

IMG_3730

DISCLAIMER ::  OK, I will work on my photography skills. Since I have very few, this may take a while!  I apologize for the lousy pictures that follow ;-}

IMG_3731

1.  WARM AND COZY print from this darling website, and a red frame.

IMG_3734

2. Chalk Paint® color card.  These sell for $5 at the shop and they are quite popular!

IMG_3735

3. A cute little spiral notebook.  I have these little cuties stashed everywhere!  One for my ever growing grocery list, one for notes, one for little hands to color, etc.

IMG_3738

4. a 4 oz. sample pot of LOUIS BLUE Chalk Paint®.  These little guys sell at the shop for $11.95.  They are perfect for painting picture frames, a little side table, lamps and so much more.

5. not pictured ::  home made fudge to enjoy as you paint your little project!

2013-12-29

So, here it is.  A sweet little give away to get your creative juices flowing!

THE DETAILS ::

You have three ways to be entered!  You can do one, or all three!  If you already 'like' MD HANEY & CO. on Facebook and receive the blog posts via email, thank you!!!

1. If you are on the BLOG page of the website, at the top right hand corner you will see a spot to enter your email address.  When you fill that out, you will receive blog posts via email (2-3 times per week).

2.  Like MD HANEY & CO. on Facebook.

3.  Leave a comment at the end of this post, saying what you would paint with Chalk Paint®.

Easy-peasy and so fun!  The give away will be open for the entire month of January, the winner will be announced on the website and Facebook January 31st!

Have a great week and thank you for a wonderful 2013!!

WINTER PAINT CLASSES AND A CHAIR :: a darling vintage chair

I hope you had a wonderful Christmas!

Our's was lovely.  And now I am looking forward to the New Year!  In some areas of my life, I love to plan, organize and dream.  {You should see my office right now, it looks like a bomb went off.  You would laugh in may face if I told you I am a 'planner, dreamer and organizer'!}  A few weeks ago I ordered this planner….bring on the planning and organizing!!  I can't wait to tell you about this planner!

Anyways, a couple of weeks ago, I found this darling vintage wing back chair.

IMG_3691

I painted the legs 'GRAPHITE' {Chalk Paint®} and then waxed them with a clear wax.

IMG_3692

I cleaned the upholstery and set her out in the sunshine for a few hours.

IMG_3703

You wouldn't believe how good of shape this wing back chair is in!

IMG_3697

I can't decide if I am going to sell her or keep her.

 I brought her over to the design studio and placed a price tag on her…..$225.

IMG_3699

If you think this darling chair would be a good fit for you home, just let me know and I will be sure to not package her up and take her to my home ;-)

IMG_3701

Pretty cute, right??

And, in other shop news, I have updated the website with the WINTER SCHEDULE.  Next Friday is the first Friday in January, so the work room will be open for you to bring in your projects and paint!  We had a great group at the last 'First Friday'.  

summerschedule copy

Hope you all have a lovely weekend!

SOFT GINGERBREAD COOKIES :: a sweet treat recipe

Soft Ginger Bread Cookies  ||  a winter treat

I have tried numerous ginger bread cookie recipes over the years.  I finally found a keeper!!  I promise, you will love these cookies!  You might even do a happy dance when you realize how easy they are!

Last night I baked the cookies while we enjoyed spending time with my in-laws.  This morning, both girls were up earlier than usual, so we decided to frost and decorate the rest of our gingerbread cookies.

IMG_3585

When we move, I will definitely miss our huge island!  It's the perfect spot for both girls to sit and help in the kitchen.

IMG_3600

I have really been working on letting go of the inner-perfectionist in me, at least when it comes to activities with the girls.  I don't want them to feel like they can never measure up.  I want them to be brave, and try new things, even if at first, they fail.  And I definitely want to be their biggest cheer-leader, not a nagging voice in their ear!

IMG_3591

I want them to enjoy spending time with me, and doing activities with me.

So, when it comes to working in the kitchen, I give Addilyn her own cookies to decorate, or bread to roll into a ball, or her own cheese to grade.  She enjoys helping in the kitchen, and I can relax and not hover over her the entire time.  It's a win-win ;-)

IMG_3601

So, back to the cookies.

We baked them last night and frosted a hand full of them after they had completely cooled.  That's the trick, don't try to frost them when they are still warm, I promise you will be disappointed and maybe even frustrated (I know that from personal experience).

IMG_3582

I prefer mine with a tall glass of cold milk.

 Although, in the morning, I am sure I will prefer my little gingerbread man with a hot cup of coffee!

IMG_3604

The frosting has a hint of lemon, a perfect accompaniment to the gingerbread.

IMG_3606

These can be made any time of year, but they sure make the best little gingerbread men!!

the

Soft Gingerbread Cookies with Lemon Frosting

Ingredients

  • 3/4 cup butter, room temperature 
  • 1 cup granulated sugar
  • 1 egg plus 1 yolk
  • 1/4 cup molasses
  • 1 tsp baking soda
  • 1/2 tsp salt 
  • 2 1/2 tsp ground ginger
  • 1 tsp cinnamon
  • 1/2 tsp ground cloves
  • 2 1/4 cups flour
  • 1/3 cup additional sugar for rolling

Lemon Frosting ~  Add the juice of one lemon, and 1 tsp. of lemon zest to a mixing bowl.  Add 3-4 cups of powered sugar and mix (with a mixer) until the frosting is smooth.  Add more powered sugar to achieve the desired consistency.

Directions

  1. Preheat oven to 350°
  2. Line a baking sheet with parchment paper, set aside.
  3. In bowl of stand mixer beat butter and sugar together for 2 minutes.
  4. Add in molasses and mix until incorporated.
  5. Beat in egg plus additional yolk, baking soda, salt, ginger, cinnamon and cloves. Mix until smooth.
  6. Turn mixer to low and add in flour until dough comes together.
  7. Refrigerate for 1 hour, or longer.
  8. Roll dough and cut into desired shapes.
  9. Bake for 9-11 minutes until edges are golden.
  10. Allow to cool on baking sheet for 3 minutes and then transfer to wire rack to cool completely.  Once cooled, frost with lemon frosting.

Notes

Store airtight at room temperature for up to 3 days….and enjoy!!!

A MASTER BATH

I am working with some clients who just purchased a second home.  The home is in really great shape.  It's simple, but really clean.  They will be decorating the home with extra furniture pieces they already own. But, they wanted some help decorating their new master bathroom {and bedroom}.  They don't have anything for those two rooms so we get to start from scratch!

 I thought I would share the fun sample board that serves as our 'road map' for the bathroom.

260693_original

We are going with white walls, and the floors are already white tile, the bathroom will feel light and bright.  Which is good because it is really small!

Here are a few inspiring white bathrooms….

8ede168e910d

Traditional-Bathroom-White-Cabinetry-Wood-Wall-The-Lettered-Cottagesource 
8ce05c2c209f0f77a2a28f64025fa662
  source
 

Pretty bathrooms!

Hopefully I will have some fun 'after' pictures to share with you!!

CHOCOLATE OATMEAL NO BAKE BARS AND CHRISTMAS AT THE STUDIO

I started decorating the front porch of the design studio the weekend after Thanksgiving.  Of course I had my two little helpers, so I wanted to keep it really simple.

IMG_3578

I had 3 objectives…..decorate quickly, use what I already have,  make it pretty!

IMG_3573

I filled old buckets with various fresh cut greens.

I love using fresh greens!  They smell amazing, they are naturally beautiful, and most of the time they are free!

IMG_3579

I made the wreath with fir and cedar branches from the back garden.

IMG_3570

I love using Chalk Boards to decorate with!  A simple little Christmas message on the Chalk Board and we are set.

IMG_3568

I forgot to turn on the market lights for the picture!  They are so fun at night.

IMG_3581

Two freshly cut trees, boxes with burlap ribbon and pine cones and a few red ornaments….all things I had laying around.  Well, not the freshly cut trees, but you know what I mean ;-)  I bought the large basket from my dear neighbor a few months ago, it provided just the right amount of height for one of the trees.

It's simple but festive.

****

The other day I 'pinned' NO BAKE CHOCOLATE OATMEAL BARS.

I love 'no bake' because they hardly take any effort.

If you are in the mood for an easy chocolate treat, you have got to make these!

IMG_3562

Best Ever Chocolate Oatmeal No-Bake Bars

  • 1 cup peanut butter
  • 1/2 cup honey
  • 1/2 cup coconut oil (you could also substitute butter)
  • 2 cups old fashioned oats
  • 1 cup shredded coconut
  • 1/2 cup chopped nuts, raisins, or dried cranberries
  • 1 1/4 cups dark chocolate chips (or regular semi-sweet chocolate chips, if you prefer)
  • 1 teaspoon vanilla extract

Melt the peanut butter, honey, and coconut oil over medium-low heat in a saucepan on the stove. {Watch this closely. Mine started to burn!}

Remove from heat once it’s melted together and add in the oats, shredded coconut, chocolate chips, nuts/raisins, and vanilla. Stir together until the chocolate is completely melted.

Pour into a greased 9×13 pan and cool in the fridge. If you’d like thicker bars, you can pour the mixture into a smaller pan.

When the mixture is hardened, cut into bars and eat. Store in the refrigerator or freezer.

Recipe adapted slightly from I Hear Exercise Will Kill You.

IMG_3566

Have a great day, and tomorrow I will show you a master bathroom design I am working on for a client!

A LITTLE OF THIS AND THAT

I have been pretty busy with various design jobs, but not really any jobs that make for good 'before and after' photos.  Offices, bathrooms, material selections, etc., spaces or things that just don't photograph well.  Matt has been busy with drawing plans and various jobs that just don't photograph well either! But, in the next few months I will have some great photos to share with you!!

So today, I just have a little of this and that…..

IMG_3532

My goal for the next month is to paint all of the random pieces that I have been collecting, but haven't taken the time to paint.

IMG_3533

I must be craving some blue in my life! This morning I realized that the pieces I have been painting over the last few days are all blue.

IMG_3538

I have also been working on painting cabinet doors with Chalk Paint®.  It really helps to have a big chunk of color when deciding on what color to use for a project!

IMG_3540

My little helper!

IMG_3546

I made Pioneer Woman's pretzel turtles this morning.  They are REALLY good!  Mine don't look as pretty as her's, but they sure taste good!

IMG_3548

They are perfect little treats for delivering with Christmas cards.

IMG_3553

I need to give them away because I am afraid I will eat them all!

Unknown

We carry DASH & ALBERT rugs at the Studio….I love them!

IMG_3556

I am going to use this rug in Addilyn's new bedroom.  I am also going to move the dresser from the master bedroom into her bedroom.  Don't you love the green dresser next to the rug?!? So fun!

IMG_3561

I am going to paint Addilyn's bed and night stand 'SCANDINAVIAN PINK'.  I think it will be a fun pop of color!  Pictures coming soon!

Until then, have a great week!!

ADDILYN'S NEW ROOM :: a toddler's room

Hi friends!

Remember this post I wrote last week?  Well, you won't believe what has transpired in the last 7 days.  I will go into more detail in the next few weeks, but for now, just know it has been pure craziness {in a good way} at the Haney household.  My shift has focused from re-decorating our master bedroom, to cleaning/packing/organizing because we are going to be moving soon!

One of the many things I am excited about, is that the girls will each have their own room.  Now, since my head has been whirling with decorating ideas, I figured it might help calm my crazy mind if I start getting ideas on paper. I thought you might enjoy seeing the ideas too!?!

258921_original

Here is a snap shot of the look I am going for in Addilyn's room.

Bright, fun, bold and a bit eclectic, just like my girl!

IMG_3521

When we moved back into our house {almost 2 years ago} I didn't take the time to decorate Addilyn's room.  I just used what we had, and knew in a few years we would start working on built-ins and really take the time to decorate.

IMG_3518

I love the bright colors in her room now, but I am going to go even brighter!  I think it will fit her bright and bold personality perfectly!

IMG_3526

And, just for kicks, a picture of her darling little Christmas tree.  Please don't mind the tree stand….we found an old pot, filled it with sand and water and it works perfectly ;-)

Next post, ideas for sweet Savanna's room…...


HOME MADE PEPPERMINT OREOS :: a holiday treat

IMG_3510  

I thought I would share my cookie contribution for the cookie exchange tonight.

HOME MADE PEPPERMINT OREOS.

The website I found the recipe from has much prettier pictures, but they sure taste good!!

HOME MADE PEPPERMINT OREOS

****

Ingredients

  • {batter}
  • 1 box devils food cake
  • 1 egg
  • 1 stick of butter softened
  • {frosting}
  • 1 sticks unsalted butter, at room temperature
  • 2 cups powdered sugar
  • 1 TB milk, or heavy whipping cream
  • 1/4 teaspoon Vanilla extract
  • 1/2 teaspoon Peppermint extract
  • Andi's crushed peppermints

Instructions

  1. Combine egg and butter in a large bowl. Mix until combined. Pour in devil's food cake and mix until the batter is smooth (about 2 min). Roll dough into a ball and push flat onto a lined cookie sheet. Bake at 350 for 6-8 minutes. Remove to cooling rack and allow cookies to completely cool.
  2. For frosting: Mix together butter. Next add milk, vanilla and peppermint extract. Then slowly add powdered sugar and beat until fluffy.
  3. Frost one cookie on the BOTTOM and then sandwich another cookie on top. I like to use a lot of frosting (make sure it's coming out the sides). Then dip the sides of the cookie into crushed peppermint andis.

Enjoy!!!!!  I prefer mine with a tall glass of cold milk ;-)


HOME MADE PEPPERMINT OREOS :: a holiday treat

IMG_3510  

I thought I would share my cookie contribution for the cookie exchange tonight.

HOME MADE PEPPERMINT OREOS.

The website I found the recipe from has much prettier pictures, but they sure taste good!!

HOME MADE PEPPERMINT OREOS

****

Ingredients

  • {batter}
  • 1 box devils food cake
  • 1 egg
  • 1 stick of butter softened
  • {frosting}
  • 1 sticks unsalted butter, at room temperature
  • 2 cups powdered sugar
  • 1 TB milk, or heavy whipping cream
  • 1/4 teaspoon Vanilla extract
  • 1/2 teaspoon Peppermint extract
  • Andi's crushed peppermints

Instructions

  1. Combine egg and butter in a large bowl. Mix until combined. Pour in devil's food cake and mix until the batter is smooth (about 2 min). Roll dough into a ball and push flat onto a lined cookie sheet. Bake at 350 for 6-8 minutes. Remove to cooling rack and allow cookies to completely cool.
  2. For frosting: Mix together butter. Next add milk, vanilla and peppermint extract. Then slowly add powdered sugar and beat until fluffy.
  3. Frost one cookie on the BOTTOM and then sandwich another cookie on top. I like to use a lot of frosting (make sure it's coming out the sides). Then dip the sides of the cookie into crushed peppermint andis.

Enjoy!!!!!  I prefer mine with a tall glass of cold milk ;-)


MASTER BEDROOM :: time to give it some style

We bought our little 'fixer' almost 8 years ago.  Wow, time really does fly, it feels like just yesterday!!  After remodeling and living in it for about 3 years, we moved out and turned it into a vacation rental while me moved into another 'fixer' and remodeled it.  We moved back into our house almost 2 years ago.  Anyways, the point being, when we moved back in, I was going to take the time to fix up each room exactly how I wanted it.

Then, I got pregnant with my little sweet pea and was dog sick the entire pregnancy.  Well, now that we are all sleeping a little better in the Haney household, I have a bit more energy to try to tackle decorating some of the rooms in our home.  Also, I have been really busy with work.  I find I need {and crave} my home to be organized and enjoyable, seems to make me a much happier girl!

The first room on my list is going to be our master bedroom, which I am sure will lead into re-decorating our master bathroom. ;-)

bedroom2 copyThe bedroom pictured above is my inspiration photo.

I love so many different styles!  Do you have that problem too?  However, I feel the style of the bedroom pictured goes perfectly with the look/feel/style of the rest of our home.  I am going to have Navy blue as the accent color {instead of green}.  I love the green pictured, but I already have a great blue rug and blue runs through the rest of our home.

IMG_3499

This is the view from our bathroom.  Our bedroom is pretty small, our King size bed takes up a lot of space.  Did you know our master bedroom use to be the kitchen?  And our bathroom use to be the laundry room?  Crazy!!

IMG_3498

The walls are currently a light blue.  I am going to paint the walls white, to match the trim and really lighten the room up.

IMG_3502

I am going to add bamboo blinds {and take away the curtains} and find a different dresser.

IMG_3501

I am going to get new bedding.....I am thinking all white with a couple of bold, blue pillows.

IMG_3504

I am going to re-paint the bathroom white too.

IMG_3503

As you can see, it's a small {and cozy} space.  I am excited to re-do this area!!

Hopefully I can have it finished before Christmas, I will keep you posted!!

FIRST FRIDAY :: bring your own furniture

A few weeks ago I was chatting with a sweet friend of mine.  {She paints furniture and re-purposes old pieces into little gems.  We met this Spring.....she buys Chalk Paint® from me, and she has become a dear friend! I am so happy our path's crossed!!!} Anyways, she threw out the idea of me opening up the work room to the public.  A space where local people can come create.  I loved it!  Below are the details..... IMG_3362

FIRST FRIDAY || the details

What :: bring your furniture/lamps/frames {whatever you want to paint} and use our work room to paint and create!

When :: the first friday of every month

Time :: 1pm-4pm, come and go as you please during that time period

Where :: the design studio, 543 west main street, carlton

Cost :: $10

Extra Details :: bring your own Chalk Paint® and wax, or purchase when you come.  The work room space, brushes, rags, and tools will be available for you to use.  I will also be around to answer questions!  Not to mention we will have hot drinks and tasty treats ;-)  No need to RSVP, just show up!

IMG_2987

Hope to see you Friday!

OH CHRISTMAS TREE

Matt is working on a remodel for a sweet couple outside of Dayton.  After his first meeting with them at their property {they just bought the home}, Matt started to convince me that we needed acreage. {wink}  Their setting is really neat....private and surrounded by farms.  The front of their property is full of Christmas trees.....

IMG_3454

And they were gracious enough to allow us to cut our tree {s} from their property.  Friday {after Thanksgiving} we headed over to pick out our Christmas tree, Addilyn even got her own darling little tree for her bedroom.

IMG_3459

Aren't those trees beautiful?

IMG_3455

Now, having grown up on a Christmas tree farm, it was never a big deal for our family to get a tree.  My mom would usually just grab one, while my dad was gone at work.

No big deal.

But, since our little family of 4 doesn't live on a Christmas tree farm, it's fun to make a big deal of it!  You know....loud Christmas music, hot chocolate and cookies......

IMG_3477

Can you believe it has taken us over 4 days to decorate our tree?  And we still are not done!  See that rogue baby under the tree?  She is one of the reasons it takes so long to decorate ;-)

IMG_3478

And there she is again, under the tree skirt.....

IMG_3482

Addilyn and I made a paper chain for the tree.  A 10' tree requires a lot of paper chain!!

IMG_3484

Our beautiful tree provided extra fresh greens for a little decorating around the house.

IMG_3483

I actually snagged the cedar from our of our Cedar trees.  I love fresh cedar!!

IMG_3489

A wood crate filled with greens {and a few magnolia sprigs}, flameless candles and a white bird.

IMG_3485

A basket filled with greens, books and birds for our outside dining table.

IMG_3497

Window boxes filled with greens and ornaments {on Matt's wood shop}.

IMG_3492

And a few greens for the front porch!

I have a feeling it may take me all month to decorate for Christmas.....but that is part of the fun!!

PUMPKIN PIE ICE CREAM :: a sweet {FALL} treat + some gratitude

So, I have two things for you on this fine Tuesday afternoon....

#1~ the best pumpkin pie ice cream EVER,

and #2 ~ a little note on gratitude.

I found a great blog via Pinterest.  I pinned the kitchen, and then enjoying looking through the blog.  She just wrote a post titled '20 little attitudes for gratitude.'   And since I am really working towards focusing on being thankful this holiday season, I was inspired to write my own 20-little-attitudes-for-gratitude.  Maybe it will inspire you to write your own list?!?


20 Little Attitudes of Gratitude

  1. Mind your manners. Say please, thank you and excuse me.
  2. Smile when you see your friends and family, look them in the eyes when you are talking.
  3. Always take the time to listen.
  4. Notice when others do kind things for you, show gratitude by action or words.
  5. Gives hugs and kisses freely through out the day.
  6. Extend grace.
  7. Don’t worry about tomorrow. No ounce of worry can change a thing about tomorrow.  Be grateful for right now.
  8. Create gratitude journals to keep track of daily blessings.
  9. Encourage strangers with a smile.
  10. Leave love notes in unexpected places like lunch boxes and under pillows.
  11. Encourage someone with a compliment.
  12. Instead of complaining, verbalize what you are thankful for.
  13. Bake extra of everything, strive to always give away a freshly baked treat.
  14. Remember to thank God for blessings each day.
  15. Surprise your family (or friends) with little gifts or treats to show you thought of them.
  16. No grumbling about minor annoyances around the house.
  17. Do special things to cherish time with your family.
  18. Reflect on happy memories regularly. Make inspiration boards of special times.
  19. Always remember, no one is perfect, have grace with yourself.
  20. Be grateful you have a house to clean.

“Gratitude unlocks the fullness of life. It turns what we have into enough, and more.” –Melodie Beatty

IMG_3439

One of the many things I am grateful for, is my awesome ice cream maker.  It is sooooo easy to make ice cream with this little guy.  Seriously.  It's the best!

This ice cream is really rich.  I think it would also make a great ice cream pie filling....maybe a graham cracker crust?  I will try it and let you know!

IMG_3441

Pumpkin Pie Ice Cream

Ingredients:

  • 1 can (15 ounces) pure pumpkin puree or 1-3/4 cups homemade cooked pumpkin puree, well-draiined
  • 1-1/2 cups heavy whipping cream
  • 1/2 cup brown sugar
  • 1/2 teaspoon salt
  • 1 teaspoon ground cinnamon
  • 1/4 teaspoon ground ginger
  • 1/4 teaspoon ground nutmeg
  • 1/4 teaspoon ground cloves
Place pumpkin puree into a strainer lined with cheesecloth for 15 minutes to drain any excess water.Gently heat heavy cream and brown sugar until small bubbles form around the edge of the pan, stirring often. Add pumpkin puree and spices.  Do not boil. Remove from heat and whisk until the sugar is dissolved. Let cool to room temperature.

Pour mixture into ice cream machine as per your machine's instructions.

Enjoy!!

CINNAMON + VANILLA CHIP SCONES :: a sweet breakfast recipe

IMG_3426

This morning I asked Addilyn what she wanted for breakfast.

'Scones, eggs and a little bacon'.

Awwww, a girl after my own heart.

I LOVE making breakfast on the weekends.  And even more than that, I love that my little sweet pea enjoys helping in the kitchen.  My vote was for pumpkin-chocolate chip scones, but I was vetoed, the  cinnamon-vanilla chip scones won,   2-1.  Fair and square.

IMG_3429

These scones have just the right amount of spice and sweetness.  A little dash of allspice makes this a "fall/winter" scone in my book.

IMG_3430

I was tempted to make a spiced-vanilla glaze, but I stuck with the good -ole powdered sugar glaze.  Next time, I am going to add some vanilla bean and spices to the glaze.   I will let you know how that turns out ;-)

Try making these soon, your family will think you are the greatest!

IMG_3426

Cinnamon + Vanilla Chip Scones

2 cups flour

2 teaspoons baking powder

1/2 teaspoon baking soda

1/2 teaspoon cinnamon

pinch of salt

pinch of allspice

1 stick of butter, cut into small pieces

3/4 cup white, vanilla chips

1/2-3/4 whole milk

1 egg, for egg wash

for glaze: 1 tablespoon melted butter, add 1-2 cups of powdered sugar and 1 tablespoon milk.

Sift together the dry ingredients and work the butter in until the mixture resembles cornmeal. Add in the chips and toss together. Slowly add the milk until the dough just comes together. Roll the dough out into a square that is approximately 1 inch thick. Cut into triangles and brush with egg wash. Bake at 400 degrees for 15 minutes. Let scones cool completely and then drizzle with glaze.

Enjoy!!

A SEASON OF THANKFULNESS

Wednesday night I was hit hard with a stomach bug.  Oh it was bad.  Maybe worse than childbirth?!?  Not sure.  Regardless, it's been several years since I was so sick.  As I laid in bed Wednesday night, I prayed that my little ones wouldn't get sick.

They didn't.

And I was reminded once again that I have so much to be thankful for!

sava2

Thankful that I get to squeeze this face every.single.day.

addi2

Thankful that I get to tuck this one into bed every.single.night.

IMG_3415

Thankful for the luxury of grocery shopping and the ability to fill my refrigerator on a regular basis.

IMG_3406

Thankful for a little chunk of earth to grow a garden.....even in the winter.

IMG_3409

Thankful for a child healthy enough to play outside.

IMG_3422

The door leading to our garage is right next to our kitchen.  I painted part of the door with Chalk Board paint, it's a fun place to right messages and notes.

Every day for the month of November, I have seen this reminder on my kitchen door ~ 'today we are thankful for....'

I often forget that this is the season of intentional gratefulness.  I sometimes have to stop myself in my busy tracks and say thank you.  I take so much for granted.  Motherhood has taught me to be intentional.  To stop and pay attention.    To notice the simple joys in life, because I might not have tomorrow.... 

HOLIDAY SCHEDULE & THE COOKIE EXCHANGE :: updates

Hello friends!

Below is an updated HOLIDAY SCHEDULE for happenings at the design studio.  I will be around this week and next week for appointments if you would like to stock up on Chalk Paint®!  The studio won't be open this Friday {11/22} or next Friday {11/28}, but just call/text/email and I will gladly meet you there!

winterschedule copy

So, the upcoming COOKIE EXCHANGE is going to be a lot of fun!!  I know the holidays can get busy, but I thought this would be a fun way to get together with friends and neighbors.

img_plan-cookie-exchange_1

Here are the details ~

DATE ::  Sunday, December 8th, 2013

TIME ::  6:30-7:30

LOCATION  ::  543 West Main Street, Carlton {the design studio/cottage}

WHAT TO BRING  ::  3 dozen cookies ~ 1 dozen to share and 2 dozen to exchange

I will have drinks, appetizers, a packaging station for your sweet treats and a warm, cozy fire ;-)

Hope you can come!!

SNAP AND SHARE :: a fun Chalk Paint® contest

Pre-contest Promo  

Annie Sloan has come up with a fun and creative contest!  They are asking customers to take their photo in front of their local stockist Chalk Paint® display, submit the photo online, and then encourage friends and family members to vote.  The wining contestant wins $1500 worth of Annie Sloan product.  How fun is that?!?

Can you imagine $1500 worth of product?!?  So fun!!

If you want to participate, you can always call or email and I will be happy to meet you at the shop.  I will even take your picture for you ;-)

OK, I am off to go bake some cupcakes with my little helper,  and cheer on the Trojans!!  Go USC!!

Have a great weekend!!

THANKSGIVING DECORATING :: some inspiration

Don't you just love this time of year?!?  I do!  The hustle and bustle, the reasons to celebrate with friends and family, and a time to reflect on all of our abundant blessings!

I am always amazed at how Thanksgiving seems to sneak up on me.  Especially now with little ones in tow!!  We still don't have our Thanksgiving plans finalized, but I thought I would post a few of my favorite inspiring Fall/Thanksgiving spaces and decorating ideas!

1-thanksgiving-table-setting-how-to-set-a-formal-place-setting-diagram

 source

FallDecor-PumpkinTabletopDisplay_zpsf815a286

source

FallDecor-WhiteandBlueGrayPumpkins_zpsb30cb968

source

dreamywhitesfalldecorating_zpsa3d0712f

source

pumpkintopiaries_zpsbe490f44

source

stonegablewhitepumpkins_zpsa509e401

source

So pretty!

Have a great weekend!!  Oh and I hope to have some BEFORE + AFTER photos for you next week!

xoxo~Darci